
Main Courses
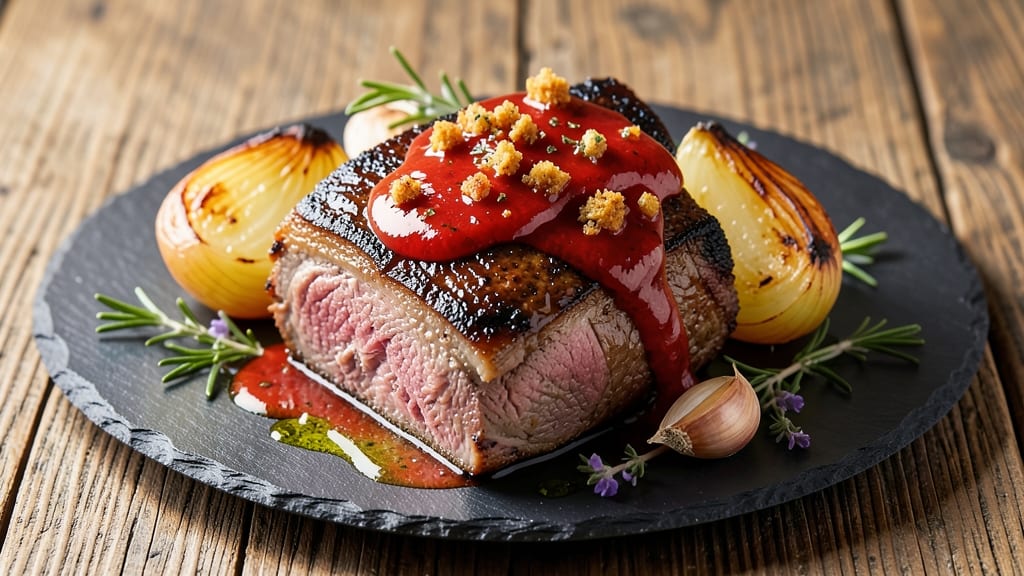
Transforming tough cuts into melt-in-your-mouth perfection, this boneless short rib roast recipe delivers restaurant-quality results without the bone-debasing effort. The secret lies in a precise combination of searing, slow braising, and proper resting—techniques that unlock deep, caramelized flavors while keeping the meat incredibly tender.
I developed this method after years of testing, and it consistently delivers results that impress even the most critical palates.
What sets this recipe apart is the balance between simplicity and professional technique. You'll start with a quick sear to build flavor, then slow-braise the ribs until they're fork-tender, all while maintaining that perfect balance between rich, meaty texture and velvety sauce.
The process takes about 3 hours from start to finish, but the hands-off braising means minimal attention required once you get going.
The final result is a roast that practically falls apart at the touch of a fork, with a surface glaze that's rich and slightly caramelized from the slow cooking process. Each slice offers layers of beefy flavor enhanced by the natural juices that render during braising.
This is the kind of dish that transforms an ordinary weeknight into a special occasion meal without requiring hours of active cooking.
Serve with classic accompaniments like roasted root vegetables, creamy mashed potatoes, or a fresh green salad to balance the richness. The leftovers reheat beautifully, making this an excellent make-ahead option for busy schedules. Let's get started on creating your most tender short rib roast yet.
Ingredients for boneless short rib roast
Six ingredients deliver melt-in-your-mouth short ribs with restaurant-quality depth.
| Ingredient | Amount | Notes |
|---|---|---|
| Boneless Short Rib Roast 🥩 | 4 lb | Trimmed of excess fat, cut into even pieces |
| Extra-Virgin Olive Oil 🫒 | ½ cup | High-quality, fruity variety for searing |
| Yellow Onion 🧅 | 1 whole | Medium size, sliced into half-moons |
| Garlic Cloves 🧄 | 6 cloves | Peeled, smashed for deeper flavor |
| Fresh Rosemary 🌿 | ¼ cup | Chopped, fresh sprigs preferred |
| Fresh Thyme 🌿 | ¼ cup | Leaves only, stems removed |
| Dry Red Wine 🍷 | 1 cup | Bold variety like Cabernet Sauvignon |
| Beef Broth 💧 | 2 cups | Low-sodium, homemade or quality store-bought |
| Tomato Paste 🍅 | 2 tbsp | Smooth, not chunky |
| Diamond Crystal Kosher Salt 🧂 | 1 ½ tsp | For seasoning, not iodized |
| Freshly Ground Black Pepper 🌶️ | 1 tsp | Coarse grind preferred |
| Worcestershire Sauce 🍯 | 1 tbsp | High-quality, anchovy-free if preferred |
| Balsamic Vinegar 🍶 | 1 tbsp | Aged, for depth of flavor |
| Honey 🍯 | 1 tbsp | Wildflower or clover variety |
The beef is everything here. Short ribs should have good marbling—ask your butcher to trim the bone and cut into even 1.5-inch cubes. Costco or Whole Foods usually carry pre-cut boneless short ribs, but if you're buying whole, look for bright red color and a nice layer of fat. Fresh herbs make a difference: Trader Joe's sells pre-chopped rosemary and thyme, but I always grab fresh sprigs and chop them myself. For the wine, any bold red works—Cab Sauv, Merlot, whatever's open. The beef broth should be rich but not salty; Imagine or Knight's are my go-tos.
No red wine? Dry sherry or beef broth with a splash of balsamic works in a pinch. Fresh herbs wilt fast, so use them within 3 days of purchase—dried thyme at half the amount is fine if you're short. Tomato paste can be the squeeze-tube kind (like Trader Joe's), but smooth is key. The Worcestershire adds complexity—Lea & Perrins is classic, but anchovy-free versions like Cocktail work too. Honey adds just enough sweetness to balance the acidity; Manuka if you're feeling fancy, but regular clover works perfectly fine.
This braise reheats even better than the first time—honestly, the flavors deepen overnight. Store leftovers in the fridge for up to 5 days, or freeze for 3 months. I like to portion it into single servings so it's ready for quick meals. The sauce thickens as it cools, so just add a splash of water or broth when reheating. Double the batch if you can—this is the kind of dish that disappears fast.
Why You'll Love This Recipe
- One-Pan Wonder: I swear by this recipe when I’m too tired to pull out a dozen dishes. Sear the short ribs in olive oil, toss in sliced onions and garlic, sprinkle rosemary—then let the oven do the rest. Minimal chopping, zero fuss, and that rich, caramelized crust forms right on the sheet pan.
- Deep Umami Magic: That first bite? It’s like a hug for your taste buds. The short ribs stay tender while developing a crust so flavorful, you’ll forget to miss slow-cooked versions. The rosemary and garlic infuse into the meat, and the onions caramelize into sweet, sticky perfection—no fancy marinades needed.
- Leftovers That Don’t Suck: I make this on Sundays because the leftovers are actually better the next day. Slice the roast thin for sandwiches, shred it into pasta, or serve it cold in salads. The flavors only deepen, and it’s way cheaper than takeout when the kids are begging for dinner.
- Budget-Friendly Luxury: Short ribs feel fancy, but this recipe stretches them like a pro. A single roast feeds four, and the onions/garlic/rosemary cost pennies. Honestly, it’s the kind of meal that makes you feel like you’re treating yourself—without the restaurant price tag. Plus, the aromas fill the whole house while it cooks.
Step-by-step instructions for boneless short rib roast
Here's how to transform tough short ribs into melt-in-your-mouth perfection without bone fuss.
Sear the Roast for Deep Flavor
Heat a Dutch oven over medium-high heat until smoking hot. Add the 0.5 cup extra-virgin olive oil and let it shimmer for 1 minute. Pat the 4 lb boneless short rib roast completely dry with paper towels—this ensures maximum browning. Place the roast in the pan and sear undisturbed for 5 minutes until a deep golden crust forms.
Flip the roast and sear the other side for another 5 minutes. The goal here is to develop that rich, caramelized crust that carries so much flavor. If you notice the oil starts to smoke excessively, reduce heat slightly but keep it hot enough to maintain that sear. Remove the roast and set it aside on a plate.
Build the Aromatic Base
In the same Dutch oven, add the sliced 1 whole yellow onion and cook for 5 minutes until softened and slightly caramelized. Add the 6 smashed garlic cloves and cook for 30 seconds until fragrant—don't let it burn, just release those aromatic oils. Stir in the 2 tbsp tomato paste and cook for 1 minute until it darkens slightly.
Here's where the magic starts: Add the 0.25 cup chopped fresh rosemary and 0.25 cup fresh thyme leaves. Pour in the 1 cup dry red wine and scrape up all those browned bits from the bottom of the pan—this deglazing captures all the flavor you've built. Let it simmer for 3 minutes until reduced by half.
Braise Until Fork-Tender
Return the seared roast to the Dutch oven along with any accumulated juices. Pour in the 2 cups beef broth and bring to a gentle simmer. The liquid should just barely cover the roast—if it's too deep, reduce it by simmering uncovered for a few minutes. Cover tightly with a lid and transfer to a 325°F oven.
Braise for 3 hours until the meat is fork-tender and easily pulls apart. Here's the thing—don't peek or lift that lid during cooking. Every time you do, you lose heat and moisture, extending your cook time. The roast is done when a knife slides in like butter with no resistance.
Finish with Glazed Richness
Remove the roast from the oven and transfer it to a cutting board. Skim any excess fat from the braising liquid in the Dutch oven, then return it to the stovetop over medium heat. Stir in the 1 tbsp Worcestershire sauce, 1 tbsp balsamic vinegar, and 1 tbsp honey. Simmer for 5 minutes until the sauce thickens slightly and coats the back of a spoon.
Slice the roast against the grain into ½-inch thick slices. Spoon the reduced braising sauce over the top and serve immediately. Each bite should deliver tender, flavorful meat with a glossy, slightly sweet glaze that ties all the components together. The rosemary and thyme should be fragrant, the wine adds depth, and the honey gives just a touch of brightness to cut through the richness.
Pro Tips For Making Boneless Short Rib Roast
- Sear in Batches: Short ribs release a ton of liquid when searing—crowd the pan, and you’ll steam them instead of brown them. Work in 2-3 batches over medium-high heat, giving each side 3-4 minutes until deep golden. (Yes, it takes longer, but that crust is worth it.)
- Smash That Rosemary: Fresh rosemary needs a little abuse to release its flavor. Rough up the sprigs with your fingers or the flat side of a knife before adding them to the pan. No, it won’t look elegant, but your roast will taste like it was made in a Provençal kitchen.
- Don’t Rush the Rest: After cooking, tent that roast with foil and let it sit for at least 15 minutes—20 if it’s thick. I learned this the hard way when I sliced into a still-sizzling roast and watched the juices pool on the cutting board instead of staying in the meat.
- Deglaze with Patience: After searing, let those browned bits cool for 30 seconds before adding liquid. Dump in a splash of red wine or broth too soon, and you’ll turn your pan sauce into a watery mess. Scrape, then simmer low—this is where the magic happens.
Storing and reheating your leftovers
Refrigerator Storage
Let your braised short rib roast cool completely before transferring it to an airtight container—I use glass Pyrex with snap-on lids for best results.
Store in the fridge at 40°F or below for up to 5 days, though I find the flavors actually deepen after 2-3 days as the meat continues to tenderize. The sauce will thicken slightly, so add a splash of beef broth when reheating. 💪
Freezer Preservation
For longer storage, portion the roast into single-serving airtight containers or freezer bags (leave 1 inch headspace for expansion). Freeze for up to 3 months—the meat stays tender, though the sauce may separate slightly.
Thaw overnight in the fridge before reheating. I label containers with dates to track freshness. ❄️
Stovetop Reheating
This is my go-to method for preserving texture. Place the roast in a heavy-bottomed pot with 2-3 tbsp of its original braising liquid, then heat over medium-low for 10-15 minutes until steaming.
Stir occasionally to prevent sticking—never boil or the meat will dry out. Taste and adjust seasoning, as flavors concentrate during storage. 🔥
Oven Refresh Method
For a restaurant-style finish, transfer the roast to a baking dish, cover with foil, and warm in a 350°F oven for 20-25 minutes. The residual moisture keeps it moist, and the gentle heat reactivates the aromatics.
Add a splash of red wine or broth before reheating if the sauce looks too thick. Perfect for serving directly from the oven. 💛
Microwave Shortcut
When time is tight, microwave single portions in a microwave-safe dish covered with a damp paper towel. Heat on 50% power for 2-3 minutes, then let rest 2 minutes before serving.
The sauce may separate slightly—stir vigorously to recombine. This method works best for quick lunches, not full dinners. ⚡
Sauce Salvage Tips
If the sauce thickens too much during storage, thin it with warm water or broth—1 tbsp at a time—while reheating. For extra richness, stir in 1 tsp butter or a splash of red wine at the end.
The key is to bring it back to a gentle simmer, not a boil, to preserve the delicate flavors. 💡
Nutrition facts
Frequently asked questions
Why do boneless short ribs need braising instead of quick cooking?
Braising transforms tough, connective-tissue-rich short ribs into tender perfection. The slow 3-hour cook at 325°F breaks down collagen while keeping moisture locked in. Quick cooking would leave them chewy—this method ensures melt-in-your-mouth results every time.
Can I substitute beef broth with something else?
Use chicken broth for a lighter flavor or red wine alone (2 cups) for deeper richness. For a dairy option, try heavy cream + 1 cup broth (reduce braising time to 2 hours to prevent curdling). Always balance liquid depth—it should just cover the meat.
What's the best way to slice boneless short rib roast?
Slice against the grain into ½-inch thick pieces for maximum tenderness. Look for the natural muscle fibers (they run diagonally) and cut perpendicular to them. A sharp knife prevents tearing, and thicker slices hold up better to reheating.
My ribs didn't fall apart—what went wrong?
Check your cook time (3 hours minimum) and oven temp (325°F—use an oven thermometer). If the meat was still tough, extend braising to 4 hours or add ½ cup extra broth to keep moisture. Overcrowding the pan can also trap steam, slowing tenderization.
How do I make this dish ahead for a dinner party?
Prepare the roast 1-2 days ahead—flavors deepen during storage! Reheat using the stovetop method with medium-low heat for 15 minutes, adding a splash of broth if needed. Keep the sauce separate until reheating to prevent soggy sides. Garnish with fresh thyme just before serving for vibrant color.