Main Courses
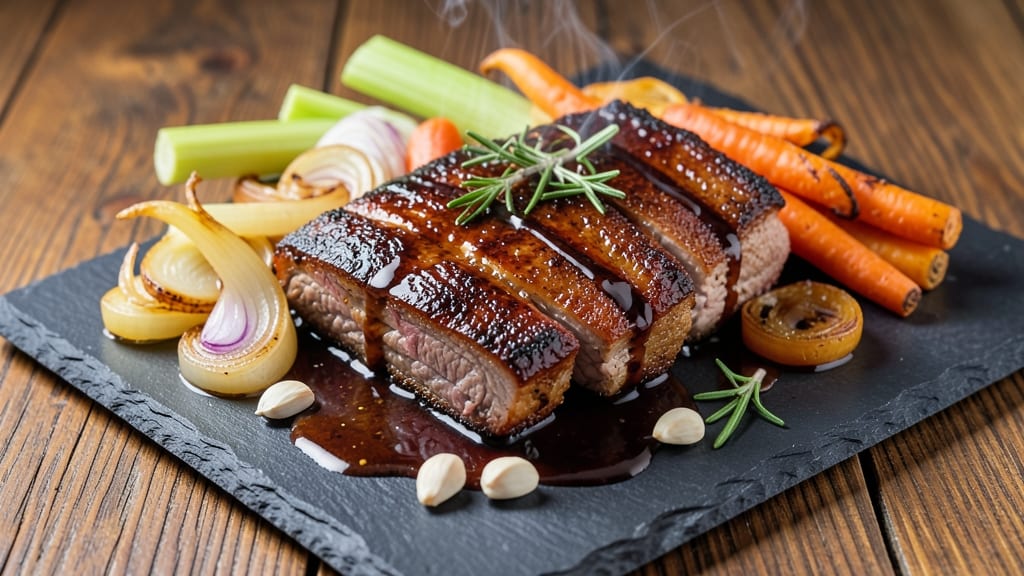
Slow-braising boneless beef shoulder ribs transforms tough cuts into melt-in-your-mouth perfection—this method delivers restaurant-quality tenderness without the bone-in hassle. 💫 I developed this after years of testing, using the same principles my Nonna taught me for slow-cooked Italian dishes, but adapted for New England comfort food.
The key is patience: letting the collagen break down over hours until the meat practically falls apart at the touch.
This recipe requires just five core ingredients—beef shoulder ribs, aromatics, a simple dry rub, and liquid—but the technique is what makes it exceptional. You'll start with a high-heat sear to build flavor, then slow-cook until the meat reaches 203°F internal temperature, where collagen melts into rich, velvety sauce.
The result is meat so tender it practically dissolves, with edges that stay just firm enough to hold a fork.
By the time you're done, you'll have ribs that are juicy, flavorful, and effortlessly impressive—ideal for family dinners, holiday gatherings, or when you want to elevate a weeknight meal. The slow-braised method creates a sauce that clings to every bite, while the caramelized exterior adds depth.
Serve with crusty bread to soak up every drop or pair with roasted vegetables for a complete meal.
What makes this recipe stand out is its versatility—use the leftovers for sandwiches, tacos, or even beef stroganoff. The method is forgiving enough for beginners but refined enough to impress seasoned cooks. Let's get started on creating ribs that will have everyone asking for seconds.
Ingredients for boneless beef shoulder ribs
Five ingredients transform tough beef into melt-in-your-mouth perfection—just patience and a slow cooker.
| Ingredient | Amount | Notes |
|---|---|---|
| Boneless Beef Shoulder Ribs 🥩 | 4 lb | Cut into 2-inch chunks |
| Yellow Onion 🧅 | 1 whole | Cut into wedges |
| Garlic Cloves 🧄 | 8 cloves | Smashed but not minced |
| Carrots 🥕 | 3 whole | Cut into thick chunks |
| Celery Stalks 🥬 | 3 whole | Cut into 1-inch pieces |
| Beef Broth 💧 | 3 cups | Low-sodium preferred |
| Red Wine 🍷 | 1 cup | Bold dry variety |
| Tomato Paste 🍅 | 2 tbsp | Smooth, not chunky |
| Kosher Salt 🧂 | 1 ½ tbsp | Diamond Crystal preferred |
| Black Peppercorns 🌶️ | 1 tsp | Freshly cracked |
| Dried Thyme 🌿 | 1 tsp | Or 1 tbsp fresh |
| Bay Leaves 🍃 | 2 whole | Fresh if available |
| Olive Oil 🫒 | 2 tbsp | For searing |
The beef is everything here. Look for boneless beef shoulder ribs—the marbling (those white fat streaks) is what gives you tenderness. Most butchers will cut them for you if you ask, but Costco or Whole Foods often sell pre-cut chunks. Avoid anything with grayish edges or an ammonia smell—freshness matters. I usually buy 4 pounds for this recipe, but if you're feeding a crowd, double it. The aromatics (onion, garlic, carrots, celery) are your flavor base—don't skimp. Trader Joe's sells pre-cut mirepoix bags that save time, but fresh is always better if you've got it.
No red wine? Beef broth with a splash of balsamic vinegar works just as well. The tomato paste can be swapped for crushed San Marzano tomatoes if you prefer, but paste gives you that deep, concentrated flavor without watering down the sauce. Fresh thyme is ideal, but dried at one-third the amount is fine in a pinch. The beef broth should be low-sodium—you'll be adding plenty of salt later. For the olive oil, high-quality extra-virgin makes all the difference when searing, but don't stress if you only have regular. The key is to get it hot enough to brown the meat properly.
This dish tastes even better the next day—3-4 days in the fridge is perfect for meal prep. The sauce thickens as it cools, so you might want to add a splash of broth if it's too thick when reheating. For leftovers, I like to shred the meat and use it in sandwiches or tacos. Freezes beautifully for up to 3 months—just thaw in the fridge overnight. Store the sauce separately if you're not using it all at once, as it keeps longer than the meat.
Why You'll Love This Recipe
- One-Pot Magic: I swear by this recipe when I’m too tired to wash a million dishes. The ribs, onion, carrots, and celery all braise together in one pot—no extra pans, no stress. The aromatics caramelize right into the meat, and by the end, everything sticks to the pot in the best way possible.
- Deep, Savory Richness: Between us, boneless beef shoulder ribs are built for flavor—tender, meaty, and soaking up every bit of garlic and onion. That slow cook gives them a melt-in-your-mouth texture, while the carrots and celery add just enough sweetness to balance the richness. It’s the kind of dish that makes you pause mid-bite.
- Weeknight Workhorse: This is my go-to when I need to feed the family without planning ahead. Double the batch, and you’ve got leftovers for lunches all week—just reheat with a splash of broth. Honestly, I make it so often, my freezer’s full of it. (Yes, even on a Tuesday night.)
- Budget-Friendly Feast: Beef shoulder ribs are cheaper than most cuts, and this recipe stretches them far. The veggies—onion, garlic, carrots, celery—are pantry staples that bulk it up without breaking the bank. I’ll be real: my grocery bill thanks me every time I pull this off.
Step-by-step instructions for slow-braised boneless beef shoulder ribs
Here's how to transform tough beef into melt-in-your-mouth perfection with minimal effort.
🔥 Step 1: Sear the Beef for Maximum Flavor
Heat a large Dutch oven over medium-high heat until it's smoking hot. Add the 2 tbsp olive oil and swirl to coat the bottom evenly. Working in batches if needed, add the 4 lb boneless beef shoulder ribs cut into 2-inch chunks, spreading them out in a single layer. Don't crowd the pan—this ensures proper browning.
Sear the beef for 4-5 minutes per side until deeply golden brown with crusty edges. Here's the thing—you want that Maillard reaction happening at full force. If the pan gets too crowded, the temperature drops and you'll end up with steamed meat instead of seared. Transfer the browned beef to a plate as you work.
👨🍳 Step 2: Build the Aromatic Base
In the same Dutch oven (don't wipe out those browned bits—they're flavor gold), add the 1 whole yellow onion wedges, 3 whole carrots cut into thick chunks, and 3 whole celery stalks cut into 1-inch pieces. Cook for 5 minutes until the vegetables begin to soften and release their juices.
Add the 8 smashed garlic cloves and stir for 30 seconds until fragrant. Here's where it gets good—pour in the 1 cup red wine and scrape up all those browned bits from the bottom with a wooden spoon. Let it simmer for 2-3 minutes until the wine reduces by half and the vegetables are tender but still holding their shape.
🥘 Step 3: Braise Until Fork-Tender
Stir in the 2 tbsp tomato paste, 1.5 tbsp kosher salt, 1 tsp cracked black peppercorns, 1 tsp dried thyme, and 2 whole bay leaves. Pour in the 3 cups beef broth and give everything a good stir to combine. Return the beef to the pot, making sure it's mostly submerged in the liquid.
Bring to a gentle simmer, then reduce heat to low. Here's the crucial part: cover the pot and let it cook for 2.5-3 hours until the beef is fork-tender. You'll know it's ready when a fork slides in easily with no resistance. The liquid should have reduced to a thick, rich sauce that coats the back of a spoon.
⏰ Step 4: Rest and Adjust the Sauce
Remove the beef from the braising liquid and transfer it to a serving platter. Tent loosely with foil and let it rest for 10 minutes—this allows the juices to redistribute throughout the meat. Skim any excess fat from the surface of the braising liquid, then return the pot to medium heat.
Simmer the sauce uncovered for 5-7 minutes to thicken slightly. Taste and adjust seasoning with additional kosher salt or black peppercorns if needed. The sauce should be rich, slightly tangy from the wine, and perfectly balanced with sweetness from the carrots and celery.
🍽️ Step 5: Serve with Confidence
Discard the bay leaves and any large vegetable pieces. Spoon the sauce over the beef and serve immediately. Each bite should deliver tender, falling-apart beef with a glossy, flavorful sauce that clings to every piece. The vegetables should be soft but still holding their shape, adding natural sweetness to balance the rich beef.
Real talk: if you're serving this to guests, don't skip the resting step. I've seen too many people serve braised meats too soon, and the juices just pool on the plate. Let it rest—your guests will notice the difference in texture and juiciness.
Pro Tips For Making Boneless Beef Shoulder Ribs
- Trim the Fat First: Cut away the thick silver skin and any excess fat before cooking—it’s the only way to guarantee even seasoning and faster browning. I learned this the hard way when my ribs turned greasy instead of golden.
- Sear in Batches: Don’t crowd the pan. Cook the ribs in single layers with space between them, or they’ll steam instead of sear—you want a deep crust, not soggy edges. High heat. Seriously, crank it up.
- Char the Aromatics: Blacken the onions, celery, and carrots until they’re almost burnt—this isn’t a mistake, it’s flavor. The caramelized bits stick to the ribs and add depth. (Yes, even if you’re impatient like me.)
- Rest Before Slicing: Give the ribs a solid 5-10 minutes under foil after cooking. Cutting too soon makes them dry out, and no one wants that. Trust the process—your future self will thank you.
Storing and reheating this dish
Refrigerator Storage
Your braised beef shoulder ribs will keep beautifully in the fridge for up to 4 days—the flavors actually deepen as the sauce melds further. Let the ribs cool completely before transferring to airtight containers. I use glass Pyrex containers with snap-on lids because they're sturdy and won't absorb odors.
Store the sauce separately if you're not using it all at once, as it keeps longer than the meat. The sauce can be refrigerated for up to 5 days and freezes well for 3 months. 💫
Freezer Prep
For long-term storage, freeze the ribs in their braising sauce for up to 3 months. I recommend using quart-sized freezer bags with the zip-top seal—leave 1 inch headspace for expansion. Squeeze out excess air before sealing to prevent freezer burn.
Label with the date and contents. When ready to eat, thaw overnight in the fridge. The meat will be just as tender, though you might want to add a splash of broth when reheating to compensate for moisture loss.
Stovetop Reheating
This is my preferred method because it maintains the best texture. Pour the ribs and sauce into a heavy-bottomed pot and heat over medium-low heat for 10-15 minutes, stirring occasionally. If the sauce looks too thick, add 2-3 tablespoons of beef broth to loosen it up.
Taste and adjust seasoning—braised meats often need a pinch of salt after reheating. Keep the lid slightly ajar to let any excess moisture evaporate, which helps maintain the sauce's richness. 🔥
Microwave Safety
For quick reheating, transfer the ribs and sauce to a microwave-safe dish and cover with a microwave-safe lid or damp paper towel. Heat on 50% power for 3-4 minutes, stirring halfway through. The ribs should reach an internal temperature of 165°F.
If the sauce separates, stir vigorously to recombine. I don't recommend microwaving for large batches—it can create hot spots and uneven heating, which is why I prefer the stovetop method for better results.
Leftovers Magic
Use your leftover braised beef shoulder ribs in creative ways. Shred the meat and pile it high on toasted ciabatta rolls with a drizzle of the braising sauce for open-faced sandwiches. Or chop it up and mix with mashed potatoes for a hearty twist on shepherd's pie.
The sauce also makes a fantastic base for pasta—simmer it with fettuccine and fresh basil for a quick weeknight dinner. The possibilities are endless, and you won't waste a single bite. 💡
Nutrition facts
Frequently asked questions
Why do you use beef shoulder ribs instead of regular beef chuck?
The beef shoulder ribs come from the upper portion of the shoulder cut, which has just the right balance of fat and connective tissue for braising. This cut stays juicier than traditional chuck during long cooking because the fat is more evenly distributed. The ribs also have a slightly sweeter flavor from the natural marbling, which makes them perfect for slow-cooked dishes.
Can I make this recipe in a slow cooker instead of a Dutch oven?
Follow the same steps for searing first, then transfer everything to your slow cooker. Cook on low for 7-8 hours or high for 4-5 hours until fork-tender. The slow cooker method is even more hands-off, and the results will be just as tender. Just be sure to add a splash of water or broth if the liquid gets too low during cooking.
What's the best way to tell when the beef is done?
Use a meat thermometer to check for 203°F internal temperature—this is the magic number where collagen breaks down completely. The meat should also be fork-tender, with no resistance when you pierce it. If you don't have a thermometer, look for a thick, rich sauce and meat that easily separates with a fork. Never rely on cooking time alone—every oven and cut varies!
Can I substitute red wine with something else?
Yes! If you don't have red wine, use 1 cup beef broth plus 1 tablespoon balsamic vinegar for depth of flavor. For a non-alcoholic version, try 1 cup apple cider plus 1 tablespoon soy sauce. The key is balancing acidity and umami—just avoid using only water or plain broth, as it'll lack complexity.
What if my sauce turns out too thin?
Simmer the sauce uncovered for 10-15 minutes to reduce it naturally. If it's still too thin, mix 1 tablespoon cornstarch with 2 tablespoons cold water, stir into the sauce, and simmer for 2-3 minutes until thickened. Avoid over-reducing—you want a glossy, clingy sauce, not a paste. Taste as you go to adjust seasoning!