
Sauces & Condiments
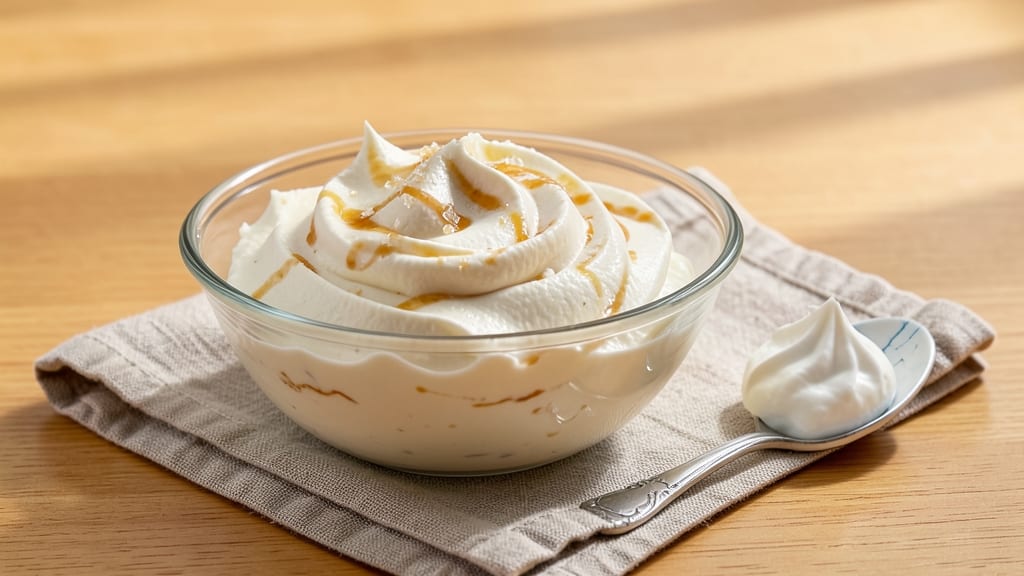
Creating a Bettercreme frosting that stays ultra-smooth and doesn’t require refrigeration is a game-changer for decorating cakes without the stress. This recipe delivers the same velvety texture and rich flavor as the brand-name version, but with precise control over sweetness and stability.
The secret lies in the ratio of butter to powdered sugar and a touch of corn syrup to prevent graininess.
What sets this frosting apart is its no-refrigerate stability—perfect for warm climates or busy decorating sessions. It spreads effortlessly, holds its shape when piped, and maintains a creamy consistency even after hours.
The recipe uses simple ingredients you likely already have on hand, and the process is straightforward, with just a few minutes of mixing required.
By the time you finish, you’ll have a batch of frosting that’s smooth, spreadable, and foolproof for any cake or cupcake project. Whether you’re covering multiple tiers or piping intricate designs, this frosting stays put without cracking or sliding.
It’s ideal for both beginners and experienced bakers who demand professional results.
Store it at room temperature in an airtight container for up to a week, making it perfect for last-minute celebrations. Let’s get started on this foolproof recipe that will elevate your desserts to the next level.
Ingredients for bettercreme frosting
Eight simple ingredients transform into ultra-smooth frosting that stays perfect for days.
| Ingredient | Amount | Notes |
|---|---|---|
| Unsalted Butter 🧈 | 1 cup | Cold, cubed for easier mixing |
| Powdered Sugar 🍚 | 3 cups | Sifted for smooth texture |
| Light Corn Syrup 🍯 | ¼ cup | Karo brand preferred |
| Vanilla Extract 🌿 | 1 tbsp | Pure Madagascar bourbon |
| Heavy Whipping Cream 🥛 | ½ cup | Full-fat for stability |
| Diamond Crystal Kosher Salt 🧂 | ¼ tsp | Fine grain preferred |
| Lemon Juice 🍋 | 1 tsp | Freshly squeezed |
| Shortening 🍞 | ¼ cup | Crisco brand recommended |
The butter and powdered sugar ratio is non-negotiable here—1 cup butter to 3 cups powdered sugar gives that signature Bettercreme texture. Crisco shortening is the secret weapon for stability, but if you're avoiding it, use an extra 0.125 cup of butter. For the corn syrup, Karo brand is the gold standard—it's what the original recipe uses. The vanilla extract? Madagascar bourbon has deeper flavor than imitation, but any pure vanilla will work. Grab the butter from the coldest part of your fridge—cold cubes mix easier and prevent melting during the process.
No corn syrup? Honey or agave at half the amount works in a pinch, but the texture won't be identical. Shortening out of stock? Extra butter plus 1 tbsp milk mimics the stability. The lemon juice brightens everything—skip it if you're allergic, but don't replace it with bottled. For the powdered sugar, sift it first (I use a fine-mesh sieve) to avoid lumps. The heavy whipping cream is optional but adds that signature tang—if you skip it, add an extra 0.5 tsp vanilla. And for the love of frosting, measure your ingredients precisely. This isn't a 'close enough' recipe.
This frosting keeps at room temperature for up to 1 week in an airtight container—no refrigeration needed. For longer storage, freeze portions for up to 3 months. When ready to use, let it sit at room temperature for 10-15 minutes to soften. I portion mine into 1-cup jars so I always have ready-to-use frosting on hand. The key to perfect piping? Let the frosting sit for 30 minutes after mixing—this lets the flavors meld and the texture stabilize. Trust me, the wait is worth it for that professional finish.
Why You'll Love This Recipe
- No Stand Mixer Needed: I’ll be real—this frosting comes together with a hand mixer or even a sturdy whisk. The corn syrup keeps it silky smooth without needing to beat it into oblivion, and the heavy cream adds that dreamy lightness with minimal elbow grease.
- Velvet Smooth Magic: That corn syrup isn’t just a filler—it’s the secret to a frosting that’s actually creamy, not grainy. The butter melts into the powdered sugar just right, and the vanilla? Oh, it sings. One taste and you’ll understand why this beats boxed frosting every time.
- Birthday Cake to Cupcakes: Serve it on a towering sheet cake for a crowd or dollop it onto mini cupcakes for a cozy night in. It’s the same foolproof recipe, just scaled to your mood—whether you’re feeding 20 or treating yourself to one perfect bite.
- Lasts a Week (Seriously): Between us, this frosting keeps beautifully in the fridge for days. I’ve used it to top leftover cake slices, swirled into coffee cakes, or even slathered on pancakes—no one ever complains. Plus, the ingredients cost next to nothing compared to store-bought.
Step-by-step instructions for Bettercreme frosting
Here's how to make this ultra-stable frosting that stays smooth without refrigeration.
Whip Cold Butter and Shortening Together
In a stand mixer fitted with the paddle attachment, combine the 1 cup cold, cubed unsalted butter and 0.25 cup shortening. Beat on medium speed for 3-4 minutes until light and fluffy—this creates air pockets that make the frosting light and stable.
The butter should nearly triple in volume and become pale yellow. I like to press a finger into the mixture—if it springs back without leaving an indent, it's ready. This step is critical because warm butter will melt into the sugar later, making the frosting grainy.
Gradually Add Powdered Sugar and Corn Syrup
With the mixer running on low speed, gradually add the 3 cups sifted powdered sugar and 0.25 cup light corn syrup. Scrape down the sides of the bowl every 30 seconds to ensure even mixing. Increase speed to medium and beat for 5-7 minutes until completely smooth.
This gradual addition prevents sugar clumping and ensures the frosting develops a silky texture. You'll see the mixture go from grainy to glossy—this is your signal that the sugar has fully incorporated. If it looks too thick, don't worry; the cream will loosen it up in the next step.
Incorporate Cream, Salt, and Flavorings
Reduce the mixer speed to low and add the 0.5 cup heavy whipping cream, 0.25 tsp diamond crystal kosher salt, 1 tbsp vanilla extract, and 1 tsp lemon juice. Mix for 2-3 minutes until fully combined and smooth.
The cream adds moisture and stability, while the salt enhances all the flavors. The lemon juice brightens the vanilla and balances the sweetness. Here's where it gets fun—the frosting should now have a thick, pipeable consistency but still be smooth enough to spread.
Beat Until Ultra-Smooth and Stable
Increase the mixer speed to high and beat for 3-5 minutes until the frosting is completely smooth, glossy, and holds its shape when piped. You'll know it's ready when it leaves clean streaks on the bowl and has a satin finish.
This final beating incorporates all the air and ensures the frosting will hold its shape at room temperature. If it's still slightly grainy, beat for another minute—patience here makes all the difference. The frosting should be thick enough to hold peaks when piped but still spreadable.
Test Stability Before Using
Transfer the frosting to a piping bag or bowl and let it sit at room temperature for 15-20 minutes. After this time, test its stability by piping a small rosette—it should hold its shape without melting or sliding.
If it's too soft, chill for 10 minutes before using. The magic of this recipe is that it stays stable for up to 4 hours at room temperature, making it perfect for decorating cakes that need to be displayed before serving. Once you've confirmed its stability, you're ready to pipe or spread it onto your baked goods.
Pro Tips For Making Bettercreme Frosting
- Weigh the Butter: I learned this the hard way—measuring butter by volume (especially when softened) leads to uneven texture. Use a kitchen scale for 227 grams (1 cup) and press it into the bowl with a rubber spatula before beating. This ensures consistent air incorporation and a smoother finish every time.
- Warm the Cream First: Skip the cold heavy cream straight from the fridge—it’ll fight your mixer. Heat the cream to about 100°F (just warm to the touch) before whipping it into the butter mixture. This helps it blend seamlessly and prevents graininess in the final frosting.
- Sift the Powdered Sugar: Yes, even if it looks fine. Sifting removes clumps and aerates the sugar, which makes the frosting lighter and easier to pipe. Do this right into the bowl before adding the butter—it saves scrubbing later.
- Add Syrup Gradually: Dumping all the corn syrup at once can make the frosting too runny. Mix in 1-2 tablespoons at a time while beating, then adjust to your desired consistency. This gives you more control, especially if you’re piping or spreading. (Your future self will thank you.)
Serving suggestions for bettercreme frosting
Cake Decorating Basics
Start with a smooth, even layer of frosting on your cake using an offset spatula. For tiered cakes, I recommend using a turntable to spin while spreading—this ensures perfect coverage without messy drips.
Apply a thin crumb coat first, let it set for 10 minutes in the fridge, then add your final layer. This prevents crumbs from mixing in and keeps your finish clean. 🎂
Piping Techniques
Use a piping bag fitted with a Wilton 1M tip for smooth rosettes and swirls. For borders, a star tip (Wilton 104) creates elegant patterns. Fill the bag no more than ⅔ full to avoid overflow.
Practice on parchment paper first—this helps you control pressure and achieve consistent shapes. The key is steady hands and even pressure.
Frosting Flavors & Garnishes
Enhance your frosting with ½ tsp almond extract for nutty depth or 1 tbsp orange zest for citrus brightness. For garnishes, I love toasted coconut flakes, crushed pistachios, or edible gold leaf for special occasions.
Sprinkle garnishes immediately after piping while the frosting is still slightly soft for better adhesion. 🌟
Cupcake Toppers
This frosting holds its shape perfectly for cupcakes—pipe swirls with a Wilton 2D tip or use a squeeze bottle for quick, even coverage. Top with sprinkles, chocolate shavings, or mini fondant shapes.
For extra flair, add a drizzle of caramel or white chocolate curls after the frosting sets. Store frosted cupcakes in an airtight container for up to 3 days.
Stability Hacks
If your frosting softens in warm rooms, chill the cake for 15 minutes before decorating. For extra stability, add 1 tsp meringue powder to the recipe—it mimics the texture of commercial frosting. Avoid overmixing once all ingredients are combined, as this can make the frosting too stiff.
Test consistency by piping a small amount onto parchment—if it holds its shape, you're ready to go. ✨
Layering Tricks
For multi-layered cakes, use a bench scraper to create clean edges between tiers. Apply a thin layer of frosting to each tier, then stack carefully. Use leveling weights if needed to ensure even layers.
For a professional finish, I recommend a cake comb to create smooth, even lines on the sides. This frosting’s stability means you can decorate hours ahead without worrying about melting. 💫
Nutrition facts
Frequently asked questions about ultra-smooth frosting
Why does this frosting stay stable without refrigeration?
The secret lies in the shortening-to-butter ratio and corn syrup. Shortening prevents melting, while corn syrup acts as a humectant to retain moisture. The heavy cream adds fat content that mimics commercial frosting stability—no ice cream tub required!
Can I make this frosting dairy-free?
Yes! Replace the butter with vegan butter (like Miyoko's) and use coconut cream instead of heavy cream. For stability, add 1 extra tbsp corn syrup to compensate for lower fat content. The texture will be slightly softer but still pipeable.
How do I fix grainy frosting?
If your frosting develops lumps, it's likely from warm butter or unsifted sugar. Beat on high speed for 2-3 extra minutes—the heat from mixing will melt any butter clumps. For stubborn grains, strain through a fine-mesh sieve into a clean bowl. Always use cold butter from the start to prevent this.
What's the best way to pipe perfect rosettes?
Use a Wilton 1M tip and fill your piping bag only ⅔ full. Hold the bag at a 45-degree angle and squeeze gently while pulling upward to create a spiral. For clean lines, twist the bag slightly as you pipe. Practice on parchment first—this frosting's stability means mistakes are easy to fix with a damp towel.
Can I tint this frosting for special occasions?
Use gel food coloring (liquid dyes can make frosting too thin). Start with ½ tsp and mix thoroughly. For pastel shades, add a tiny bit of white frosting first. Avoid overmixing after adding color—this can incorporate air bubbles. Test on a small piece of parchment before committing to your cake.