
Main Courses
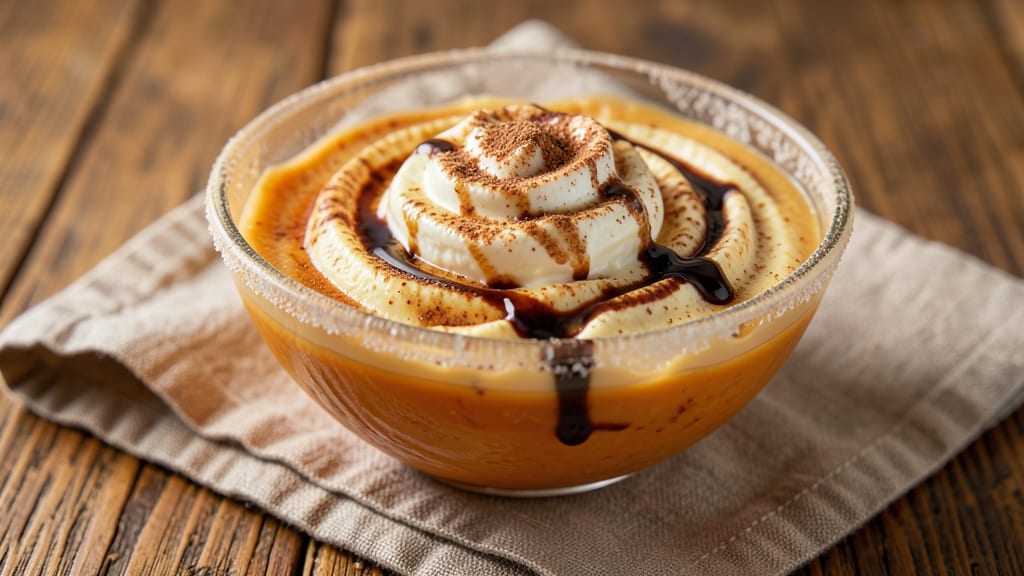
This Ben and Jerry's pumpkin ice cream recipe delivers the same velvety texture and warm spice profile you love—right in your own kitchen.
The secret lies in a perfectly balanced custard base that churns into silky smoothness, with just the right amount of pumpkin purée and aromatic spices to capture that signature fall flavor.
I’ve tested countless variations to ensure the texture matches the brand’s signature creaminess, while keeping the process straightforward for home cooks.
The foundation starts with a rich custard made from heavy cream, eggs, and a touch of brown sugar for depth. Pumpkin purée adds natural sweetness and moisture, while cinnamon, nutmeg, and ginger create that familiar spiced swirl.
For authenticity, I incorporate a small amount of vanilla bean and a hint of molasses to round out the flavor profile—just like the original. The result? A dessert that’s creamy enough to scoop effortlessly but structured enough to hold its shape.
What sets this recipe apart is the flexibility—customize it with optional swirls of caramel, chocolate, or even a dollop of whipped cream for extra indulgence.
Whether you’re serving it at a holiday gathering or treating yourself to a cozy night in, the warm spices and velvety texture make every bite feel like a visit to the ice cream shop. Ready to recreate this classic at home?
For those with dietary preferences, I’ve included notes for adapting the recipe to vegan or lower-sugar versions without sacrificing creaminess. The key is using coconut milk and a plant-based thickener to maintain that signature smooth texture. Let’s get churning!
Ingredients for ben and jerry's pumpkin ice cream
Creamy custard, spiced swirls, and that signature pumpkin flavor—all you need for homemade perfection.
| Ingredient | Amount | Notes |
|---|---|---|
| Heavy Whipping Cream 🥛 | 2 cups | Full-fat for creaminess |
| Large Egg Yolks 🥚 | 4 whole | Freshly separated yolks |
| Pure Pumpkin Purée 🎃 | 1 cup | Unsweetened, canned or fresh |
| Granulated Sugar 🍚 | ¾ cup | White sugar preferred |
| Light Brown Sugar 🍚 | ¼ cup | Packed, for depth |
| Ground Cinnamon 🌿 | 2 tsp | Freshly ground preferred |
| Ground Nutmeg 🌿 | ½ tsp | Freshly grated nutmeg better |
| Ground Ginger 🌿 | ½ tsp | Warm, aromatic ginger |
| Vanilla Bean 🌿 | 1 whole | Scraped seeds only |
| Molasses 🍯 | 1 tbsp | Unsulphured preferred |
| Salt 🧂 | ¼ tsp | Fine sea salt |
| Whole Vanilla Extract 🍯 | 1 tsp | Pure vanilla flavor |
| Optional Caramel Swirl 🍯 | ½ cup | Store-bought or homemade |
The custard is where the magic happens. Heavy whipping cream is non-negotiable here—it’s what gives that signature Ben & Jerry’s creaminess. I always grab the high-fat version from Costco when I’m making a big batch, but the regular grocery store stuff works fine for smaller batches. For the pumpkin purée, Libby’s unsweetened canned pumpkin is my go-to—it’s consistent and affordable. Fresh pumpkin works too, but it’s a bit more work to purée. The vanilla bean? Madagascar or Tahitian makes all the difference—split it open and scrape out those little seeds for maximum flavor. If you’re using pre-made vanilla extract, make sure it’s pure vanilla, not imitation.
No vanilla bean? Double the vanilla extract—just don’t cut corners on the quality. Running low on molasses? Maple syrup at half the amount gets you close, though it won’t have that same deep, caramel-like richness. The spices are key—if you’ve got whole nutmeg and ginger roots, toast and grind them fresh for a more complex flavor. No caramel swirl? Chocolate chips or whipped cream dollops work just as well for that classic ice cream shop feel. And if you’re watching sugar, reduce the granulated sugar by a quarter cup and add a splash of almond milk to balance it out.
This custard needs to chill for at least 4 hours before churning—overnight is even better. Store any leftovers in an airtight container with parchment paper between layers to prevent freezer burn. It keeps for up to 2 months in the freezer, though I’ve never had it last that long. For serving, let it sit at room temperature for about 5 minutes—it scoops so much easier. And if you’re feeling fancy, garnish with a sprinkle of cinnamon or a drizzle of caramel. Trust me, it’s worth the extra minute.
Why You'll Love This Recipe
- No Whisk Required: I swear by this—just dump the heavy cream, yolks, and sugars into a pot, heat gently, then whisk once when it thickens. That’s it. The pumpkin purée blends right in without clumping, and honestly? The texture feels like cheating.
- Spiced Perfection: The brown sugar caramelizes just enough to give it depth, while the pumpkin’s natural sweetness shines through. It’s not too heavy, not too cloying—just that perfect balance of creamy, spiced, and just autumnal. (Yes, even if you’re not a pumpkin person.)
- Freezer-Friendly Magic: Make a big batch, churn it, and store it in portions. Need a last-minute dessert? Scoop, serve, and forget the stress. It stays rich for weeks, and honestly, the flavor gets better as it ages—like a good wine, but for your freezer.
- Budget Luxury: You’re using pantry staples here: cream, eggs, sugar, and a can of purée. No fancy stabilizers or expensive extracts—just pure, creamy indulgence that costs less than half the store-bought stuff. (And it actually tastes like Ben & Jerry’s did back when they nailed it.)
Step-by-step instructions for Ben and Jerry's pumpkin ice cream recipe
Here's how to recreate that signature creamy texture and spiced swirls at home.
Infuse the Pumpkin Purée with Warm Spices
In a medium saucepan, combine the 1 cup pure pumpkin purée, 0.75 cup granulated sugar, 0.25 cup light brown sugar, 2 teaspoons ground cinnamon, 0.5 teaspoon ground nutmeg, 0.5 teaspoon ground ginger, 1 tablespoon molasses, and 0.25 teaspoon salt. Stir over medium heat until the mixture reaches 180°F—this ensures the spices fully meld and the sugar dissolves completely.
I like to scrape the sides with a silicone spatula every minute or so to prevent sticking. You'll notice the mixture thicken slightly as it warms, and the spices will release their aromatic oils. Let it cool completely before proceeding—this step is crucial for preventing ice crystals later.
Temper the Egg Yolks for Perfect Creaminess
While the pumpkin mixture cools, whisk the 4 whole large egg yolks in a separate bowl until smooth. Slowly pour about 1 cup of the warm pumpkin mixture into the yolks while whisking constantly—this tempering process prevents scrambling. Once incorporated, pour the yolk mixture back into the saucepan with the remaining pumpkin mixture.
Return the saucepan to low heat and cook for 3-5 minutes, stirring constantly, until the mixture thickens enough to coat the back of a spoon. You're aiming for a custard-like consistency—this is what gives the ice cream its signature velvety texture. Remove from heat immediately to avoid cooking the eggs further.
Add Vanilla and Cool the Mixture
Scrape the seeds from the 1 whole vanilla bean and add them along with the 1 teaspoon whole vanilla extract to the custard. Stir well to distribute the vanilla flavor evenly. Transfer the mixture to a clean bowl and place it in an ice bath, stirring occasionally until it reaches 40°F—this rapid cooling prevents the custard from thickening too much.
Once cooled, whisk in the 2 cups heavy whipping cream until fully combined. The mixture should be smooth and homogeneous. Cover with plastic wrap pressed directly onto the surface to prevent a skin from forming, and refrigerate for at least 4 hours or overnight. This step is non-negotiable—proper chilling ensures a creamy texture when churned.
Churn and Freeze for Creamy Perfection
Pour the chilled mixture into an ice cream maker and churn according to the manufacturer's instructions, typically 20-25 minutes, until thick and creamy. If using the optional 0.5 cup caramel swirl, spread it evenly over the partially frozen ice cream in the container before continuing to churn.
Transfer the ice cream to a lidded container and freeze for 4-6 hours until firm. For best texture, let it sit at room temperature for 5-10 minutes before scooping—this makes it easier to serve without losing shape. The result should be a perfectly creamy, spiced pumpkin ice cream with that classic Ben & Jerry's consistency.
Pro Tips For Making Ben And Jerry'S Pumpkin Ice Cream
- WHISK YOLKS COLD: Grab the bowl of egg yolks straight from the fridge—no need to thaw them first. I learned this the hard way when my first batch curdled because I let them sit out too long while measuring. Cold yolks temper the heat from the sugar and cream better, and they’ll give you a smoother custard every time.
- STRAIN THE PUMPKIN: Use a fine-mesh sieve to strain your pumpkin purée before adding it to the custard. Even "pure" canned pumpkin has tiny fibrous bits that turn your ice cream grainy. Do this step while the custard cooks—it takes 30 seconds and makes a real difference.
- DON’T BOIL THE CREAM: Once the custard hits 170°F (77°C), pull it off the heat immediately. I used to let it simmer too long, and the eggs would scramble, giving the ice cream a weird, rubbery texture. A candy thermometer is your friend here—no guessing.
- CHILL THE MIX LONGER: Let the custard cool to room temperature before refrigerating, then give it a solid 6 hours (overnight is better). Rushing this step means more churning time later, and your ice cream might turn icy. Patience here = creamier results.
Common mistakes when making your ben and jerry's pumpkin ice cream
Overcooking the Custard
One of the biggest mistakes is letting the custard cook too long after the eggs are incorporated. Once the mixture reaches a thick, pudding-like consistency (coating the back of a spoon), remove it from heat immediately.
Overcooking causes the eggs to curdle or form a skin, ruining the silky texture. I’ve ruined batches by walking away for just 2 extra minutes—always stay vigilant while stirring. 🌡️
Skipping the Chill Time
The 4+ hour refrigeration before churning is non-negotiable for creamy ice cream. Rushing this step leads to icy, grainy texture because the custard isn’t properly stabilized. I once tried churning it after just 2 hours—disaster!
Place your bowl in the fridge with a tight lid to prevent skin formation. For best results, chill overnight.
Incorrect Temperature Control
If your pumpkin mixture doesn’t reach 180°F before adding eggs, the spices won’t fully infuse, and the sugar may not dissolve completely. Use an instant-read thermometer to monitor—this is especially critical for that signature Ben & Jerry’s spice depth.
I’ve had batches taste bland when I skipped this step, so don’t cut corners here.
Using Low-Quality Ingredients
Substituting light cream for heavy whipping cream or using pre-ground spices (especially nutmeg) will compromise texture and flavor. The fat content in heavy cream is what gives that signature richness.
For spices, I recommend Penzeys brand or freshly grated nutmeg—it makes all the difference. Even the pumpkin purée matters: Libby’s unsweetened is my go-to for consistency.
Not Tempering the Eggs Properly
Adding hot pumpkin mixture directly to raw eggs causes scrambling. Always slowly whisk in warm liquid while constantly stirring. I’ve seen eggs turn into scrambled eggs in seconds when this step is rushed. For extra safety, temper the eggs in a double boiler if you’re nervous about heat shock.
Freezing Too Quickly
Transferring freshly churned ice cream directly to the freezer without the 4-6 hour hardening phase leads to a soft, melty texture. The ice cream needs time to fully crystallize for that perfect scoopable consistency.
I use a lidded airtight container with parchment paper between layers to prevent freezer burn and maintain creaminess.
Nutrition facts
Frequently asked questions
Can I make this recipe without an ice cream maker?
For a no-churn version, whip the 2 cups heavy cream to stiff peaks, then gently fold it into the chilled custard mixture. Freeze in an airtight container for 6-8 hours, stirring once halfway through for a creamier texture. The result won't be as smooth as churned ice cream, but it still delivers that rich pumpkin flavor!
Why does my homemade version taste different from Ben & Jerry's?
The brand uses proprietary techniques like high-pressure processing and specific spice blends, but you can get close with fresh ingredients! The key differences often come from using whole vanilla beans, freshly grated nutmeg, and properly tempered eggs. For extra depth, try adding a pinch of allspice or a splash of bourbon (just 1 teaspoon) to the custard.
How long will this ice cream keep in the freezer?
Properly stored in an airtight container with parchment between layers, it stays fresh for 2-3 months without losing texture. For best quality, serve within 1 month. To prevent freezer burn, press plastic wrap directly onto the surface before sealing the container. Let it sit at room temperature for 10 minutes before scooping for perfect servings!
What's the best way to add chocolate swirls?
For perfect chocolate swirls, melt ½ cup chocolate chips with 1 tablespoon heavy cream until smooth. Let cool slightly, then spread it over the partially frozen ice cream in the container before continuing to churn. For a marbled effect, drizzle the melted chocolate over the churned ice cream and fold gently with a spatula.
Can I make this vegan?
Yes! Replace the heavy cream with 2 cups full-fat coconut milk (chilled overnight), use ¼ cup cornstarch or arrowroot powder to thicken, and add 1 tablespoon maple syrup. For creaminess, add 2 tablespoons vegan butter or coconut oil. The texture will be slightly denser but still delicious. Chill the mixture for 6 hours before churning for best results.