
Soups & Stews
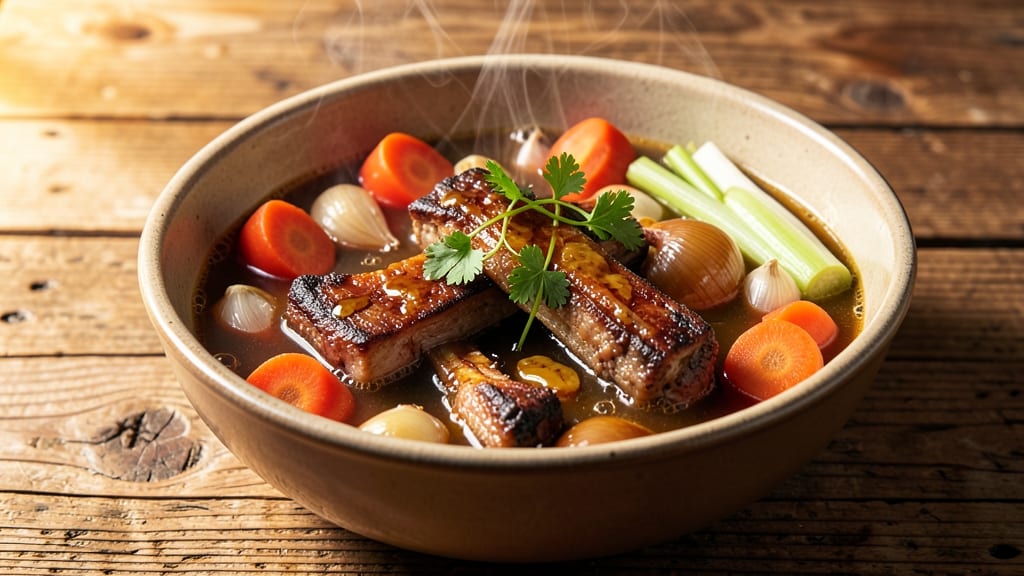
Transforming beef ribs into a deep umami-rich broth is one of the most rewarding cooking techniques you’ll master—packed with collagen, gelatin, and slow-developed flavors that elevate any dish.
This recipe extracts every ounce of flavor from bones and connective tissue through a precise 8-hour simmer, creating a velvety foundation for soups, risottos, or sipping straight from a bowl. The key lies in roasting the ribs first to deepen their caramelized depth before simmering.
What sets this broth apart is the balance of aromatics—carrots, celery, and onions—roasted alongside the ribs to build a flavor base before adding herbs and spices. A splash of apple cider vinegar at the start helps break down collagen faster, while bay leaves and peppercorns add subtle complexity.
The result? A golden, gelatinous broth so rich it turns plain grains into gourmet meals.
This method delivers restaurant-quality depth without requiring special equipment—just a large pot, patience, and attention to detail. The broth thickens naturally as it cools, creating a luxurious texture perfect for drizzling over roasted vegetables or using as a base for hearty stews.
Every sip carries the essence of slow-cooked ribs, making it worth the time investment.
For maximum flavor, strain and store the broth in the fridge for up to 5 days or freeze for months. Use it as a standalone sipping broth, a cooking liquid for grains, or the star of a beef rib soup—the possibilities are endless.
Let’s get started on creating your own velvety, umami-packed masterpiece.
Ingredients for beef rib broth
Roasted bones, aromatic vegetables, and slow-simmered collagen create this restaurant-quality beef rib broth.
| Ingredient | Amount | Notes |
|---|---|---|
| Beef Rib Bones 🦴 | 4 lb | Raw, meaty ends preferred |
| Yellow Onions 🧅 | 2 whole | Peeled, quartered, charred |
| Carrots 🥕 | 4 whole | Scrubbed, cut into chunks |
| Celery Stalks 🌿 | 4 whole | Trimmed, cut into pieces |
| Garlic Cloves 🧄 | 6 cloves | Peeled, lightly crushed |
| Apple Cider Vinegar 🍎 | ¼ cup | Unfiltered for acidity |
| Bay Leaves 🌿 | 2 whole | Dried, standard size |
| Black Peppercorns 🌶️ | 1 tbsp | Crushed, not ground |
| Fresh Thyme Sprigs 🌿 | 4 whole | Stems intact |
| Fresh Parsley Stems 🌿 | 4 whole | Tied in bundle |
| Water 💧 | 12 cups | Filtered preferred |
| Diamond Crystal Kosher Salt 🧂 | 1 ½ tbsp | For seasoning |
| Extra-Virgin Olive Oil 🫒 | 2 tbsp | For roasting |
The beef rib bones form the foundation—opt for meaty ends with marrow for maximum gelatin extraction. Costco or local butchers often carry these in bulk, or ask your grocer to cut them for you. For best results, choose bones with visible connective tissue and a rich, beefy aroma. The apple cider vinegar is non-negotiable; it helps break down collagen faster during the initial simmer. If you can't find unfiltered vinegar, regular apple cider works in a pinch. The aromatic vegetables—onions, carrots, and celery—should be charred slightly during roasting to deepen their flavor. Whole Foods or farmers markets often carry organic versions with more vibrant color, but conventional works fine if fresh.
No bay leaves? Dried thyme at half the amount provides similar earthiness, though the flavor profile shifts slightly. Running out of thyme? Fresh rosemary sprigs work well too, though they impart a more piney note. The parsley stems are crucial—they add brightness and prevent bitterness. If you only have fresh leaves, use one-quarter cup chopped parsley instead. For a deeper umami punch, add 1 teaspoon fish sauce or soy sauce during the final 30 minutes of simmering. The olive oil should be high-quality—California Extra Virgin brands like Corto or Lucini work beautifully for roasting. If you're short on time, skip the roasting entirely and add the vegetables raw, though the flavor will be less complex.
This broth thickens as it cools, creating a luxurious, gelatinous texture. Store in glass jars or airtight containers in the refrigerator for up to 5 days, or freeze for up to 6 months—the fat solidifies beautifully, preserving flavor. For best results, skim off any congealed fat before reheating. The broth freezes exceptionally well; portion into ice cube trays for easy single-serving use in soups or grains. Always let it cool completely before refrigerating to prevent bacterial growth. The gelatin content increases with longer simmering, so don't rush—10-12 hours yields the richest results.
Why You'll Love This Recipe
- I swear by this trick: just toss in whole onions, carrots, and celery stalks—no peeling, no dicing. The bones do all the work, and by the end, you’ve got that rich, golden broth without ever touching a knife. (Yes, even on a Tuesday night.)
- No-Chop Necessary: I swear by this trick: just toss in whole onions, carrots, and celery stalks—no peeling, no dicing. The bones do all the work, and by the end, you’ve got that rich, golden broth without ever touching a knife. (Yes, even on a Tuesday night.)
- Deep Umami Magic: That first sip? Pure satisfaction. The beef ribs caramelize into something almost sweet, while the garlic cloves and celery stalks infuse layer upon layer of savory depth. It’s the kind of flavor that makes you pause mid-slurp—like a hug in a bowl.
- Freezer-Friendly Staple: Make a big batch, freeze it in portions, and thank me later. This broth becomes the secret weapon for soups, stews, or even a quick weeknight risotto. I’ve got jars stashed for emergencies, and honestly? They never last.
Step-by-step instructions for beef rib broth with deep umami flavor
Transform simple ingredients into a velvety, collagen-rich broth through precise technique.
Roast the Bones and Aromatics for Maximum Flavor
Preheat your oven to 425°F and position a rack in the middle position. Arrange the 4 lb beef rib bones on a rimmed baking sheet in a single layer, meaty ends facing up. Drizzle evenly with the 2 tbsp extra-virgin olive oil and toss gently to coat all surfaces.
Place the 2 whole yellow onions (quartered), 4 whole carrots (cut into chunks), and 4 whole celery stalks (cut into pieces) directly on the baking sheet with the bones. Roast for 30 minutes, stirring once halfway through, until the vegetables soften and the bones develop a deep mahogany color. This caramelization forms the flavor foundation of your broth.
Deglaze and Build the Broth Base
Transfer the roasted bones and vegetables to a large stockpot with a tight-fitting lid. Add the 6 peeled, lightly crushed garlic cloves, 2 whole bay leaves, 1 tbsp crushed black peppercorns, 4 whole fresh thyme sprigs, and 4 whole fresh parsley stems (tied in a bundle). Pour in the 12 cups water and bring to a full boil over high heat.
Once boiling, immediately reduce heat to low and add the 0.25 cup apple cider vinegar. The acid helps extract collagen from the bones and prevents the broth from becoming cloudy. Skim any foam that rises to the surface during the first 15 minutes of simmering to ensure clarity.
Simmer for Collagen Extraction and Depth
Partially cover the stockpot and maintain a gentle simmer for 3-4 hours, adding water as needed to keep the bones submerged. The broth should never boil vigorously—this breaks down the collagen into gelatin, which gives your final product that signature richness. Check occasionally and adjust the heat to maintain 180-190°F on the surface.
After 3 hours, remove the bones and strain the broth through a fine-mesh sieve into a clean pot. Discard the solids and return the broth to the stove. Add the 1.5 tbsp diamond crystal kosher salt and simmer uncovered for an additional 30 minutes to concentrate flavors. The broth should now have a deep amber color and a velvety texture.
Finish and Store for Maximum Freshness
Let the broth cool to room temperature, then transfer it to airtight containers. For best results, refrigerate for up to 5 days or freeze for up to 3 months. The fat will solidify on top—simply skim and discard before reheating. This broth develops even more complexity over time as the flavors meld.
Use your finished beef rib broth as a base for risottos, braises, or sipped straight with a sprinkle of fresh herbs. The collagen-rich nature makes it particularly nourishing, while the roasted aromatics provide a depth of flavor that elevates any dish.
Pro Tips For Making Beef Rib Broth
- CHAR THE BONES FIRST: Skip the slow start—blast those beef rib bones in a 450°F oven for 20 minutes before adding liquid. The Maillard reaction kicks in, turning bland bones into flavor bombs right from the get-go. (Yes, even if you’re impatient like me, this isn’t optional.)
- CUT ONIONS IN HALVES: Whole onion bulbs caramelize better than chopped pieces and won’t turn to mush. Slice them in half, peel, and lay them cut-side down on the bones early—let them brown for 10 minutes before adding water. The deeper color means more flavor, no extra work.
- DON’T SKIP THE BLANCH: Toss carrots and celery in boiling water for 2 minutes before adding to the pot. This removes dirt and bitterness, so they sweeten the broth instead of muddying it. (I learned this the hard way after tasting a batch with gritty veggies.)
- USE COLD WATER: Start with ice water or room-temp liquid—hot water cooks the bones too fast, locking in less collagen and gelatin. Fill the pot halfway, then let it come to a boil before adding more. Patience here guarantees a richer, clearer broth. (Your future self will thank you.)
Pro cooking tips for beef rib broth
Roasting for Depth
Roasting the beef rib bones and aromatics at 425°F for 30 minutes creates a flavor foundation that simmering alone can't match. The Maillard reaction caramelizes the bones, producing deep umami notes that infuse the broth.
I use a Vitamix baking sheet for even heat distribution—its heavy gauge steel prevents hot spots. For extra flavor, I toss in 1 teaspoon smoked paprika during roasting, which adds subtle smokiness without overpowering.
Acid Trick
The 0.25 cup apple cider vinegar is non-negotiable for collagen extraction. I add it immediately after boiling to break down proteins in the bones faster. For a tangier profile, I sometimes substitute 1 tablespoon lemon juice instead, though apple cider's malic acid works better for depth.
Skim the foam vigorously during the first 15 minutes—this removes impurities that would otherwise cloud your broth.
Temperature Control
Maintaining a gentle simmer (180-190°F) is critical—boiling vigorously breaks down collagen too quickly, resulting in a thinner broth. I use a Thermoworks Smoke thermometer to monitor surface temperature. If your stove lacks precise control, reduce heat to medium-low and add water gradually to maintain even cooking.
The longer you simmer (up to 12 hours), the richer the gelatin content becomes.
Herb Bundles
Tying thyme and parsley stems into a bundle keeps them intact during simmering, preventing bitterness from released tannins. I use heavy-duty butcher twine to secure the bundle tightly. For a Mediterranean twist, I add 2 sprigs of fresh rosemary alongside the thyme—just remove it before straining.
The parsley stems add brightness, while thyme contributes earthy depth without overpowering the beefy flavor.
Salt Timing
Adding the 1.5 tbsp kosher salt during the final 30 minutes of simmering ensures even distribution without over-salting. I taste the broth before adding salt—sometimes the roasted bones contribute enough saltiness that I reduce to 1 tbsp.
For a deeper umami punch, I stir in 1 teaspoon fish sauce during these last minutes, though it's optional. This adjustment balances the broth's natural richness.
Straining Secrets
Use a fine-mesh sieve or cheesecloth-lined colander to strain the broth, catching even the smallest particles. I double-strain through a coffee filter for crystal-clear results, though this removes some gelatin. For maximum body, strain once through cheesecloth, then once through a fine sieve. The fat will naturally rise to the top—skim it off before storing, but save it for cooking or drizzling over finished dishes for added flavor.
Nutrition facts
Frequently asked questions about beef rib broth
Why does roasting the bones first make such a difference?
The roasting step (at 425°F for 30 minutes) creates the Maillard reaction, which caramelizes the bones and vegetables, developing deep umami flavors that simmering alone can't achieve. This step builds a flavor foundation that transforms your broth from good to extraordinary.
Can I use regular vinegar instead of apple cider vinegar?
While regular vinegar works in a pinch, apple cider vinegar's malic acid helps break down collagen more effectively, creating a richer broth. For a tangier profile, you could substitute 1 tablespoon lemon juice, but apple cider vinegar remains the best choice for depth.
How do I know when the broth is done?
The broth should simmer gently for 8 hours (or up to 12 hours for maximum gelatin content). When finished, it will have a deep amber color, velvety texture, and rich aroma. The bones should feel soft when squeezed with tongs.
What can I do with leftover bones after making broth?
Once you've extracted all the flavor, the bones can be used for bone broth again—just add fresh water, aromatics, and simmer for another 4-6 hours. Alternatively, you can crush them into bone meal for garden fertilizer or compost.
Can I make this broth in a slow cooker?
Roast the bones and vegetables first, then transfer everything to a 6-quart slow cooker with 12 cups water. Cook on low for 10-12 hours, skimming foam occasionally. The gentle heat ensures even collagen extraction without boiling.