
Side Dishes
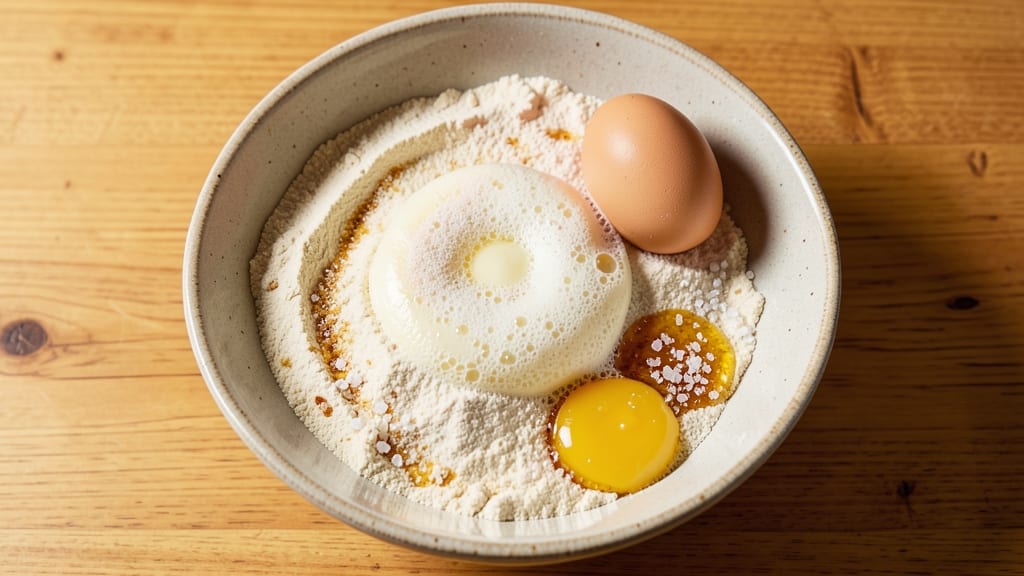
This basic bread roll recipe delivers soft, pillowy bites that transform any meal into something special—no fancy techniques required. The secret lies in a simple dough that develops flavor during proofing while staying light and airy.
I’ve perfected this method over years of baking, ensuring every roll turns out tender inside with a crisp, golden crust. Perfect for sandwiches, dipping, or simply enjoying with butter.
The dough comes together in just 10 minutes, then rests while you prepare the rest of your meal. Using active dry yeast and warm water kickstarts fermentation, while the right flour-to-water ratio creates a smooth, elastic dough that’s easy to shape.
The key to fluffy texture is letting the rolls proof until nearly doubled—patience here makes all the difference. Baking at high heat ensures a crisp exterior while keeping the inside soft and warm.
What you’ll end up with are pillowy rolls that stay fresh for days, perfect for meal prep or last-minute gatherings. The aroma of freshly baked bread will fill your kitchen, and the taste—slightly sweet, with a hint of yeasty warmth—is impossible to resist.
Whether you’re serving them with soup, stuffing them with meat, or simply slathering them in butter, these rolls elevate any dish effortlessly.
For extra flavor, try adding a pinch of salt to the dough or sprinkling sesame seeds on top before baking. The variations are endless, but the basic recipe remains foolproof. Let’s get started—your kitchen will thank you for this simple, satisfying treat.
Ingredients for basic bread roll
Twelve simple ingredients transform into pillowy rolls that taste like homemade magic.
| Ingredient | Amount | Notes |
|---|---|---|
| Active Dry Yeast 🍞 | 2 ¼ tsp | One packet equals 2.25 tsp |
| Warm Water 💧 | 1 cup | 110°F for activating yeast |
| All-Purpose Flour 🌾 | 4 cups | Plus 2 tbsp for shaping |
| Granulated Sugar 🍚 | 1 tbsp | Feeds yeast for activation |
| Unsalted Butter 🧈 | ½ cup | Softened, not melted |
| Large Eggs 🥚 | 1 whole | Room temperature preferred |
| Salt 🧂 | 1 tsp | Kosher or sea salt |
| Milk 🥛 | ¼ cup | Warm, not hot |
| Sesame Seeds 🌻 | 1 tbsp | Optional for topping |
| Vegetable Oil 🫒 | 1 tbsp | For greasing bowl |
The yeast is your flavor starter—Bob’s Red Mill or Saf-Instant work best, but any active dry yeast will do. Warm the water to 110°F (like bathwater), not boiling. The flour matters too: King Arthur or Gold Medal give the best texture. I grab mine at Walmart or Kroger—no need for specialty stores. The butter should be soft but not melted (press it—if it leaves a dent, you're good). Room-temperature eggs mix in smoother, but if yours are cold, just let them sit out for 30 minutes. The milk? Warm it slightly—just enough to feel cozy to your wrist.
No sesame seeds? Everything bagel seasoning or poppy seeds work just as well. Short on butter? Olive oil or shortening keeps the rolls tender, though butter gives that golden crust. The dough will feel sticky—don’t panic. Wet your hands slightly when shaping, and use the extra 2 tbsp flour only if needed. For a quicker rise, proof the dough in a warm oven with a bowl of hot water on the bottom. No yeast? Sourdough starter can replace it, but adjust the ratio to 1:1 with water.
Freshly baked rolls stay soft for 3 days wrapped in a towel, but they reheat beautifully. Wrap cooled rolls in foil and freeze for up to 3 months—just thaw at room temp before serving. I make a double batch every time: half for the week, half for freezing. The aroma alone makes this recipe worth it—nothing beats homemade bread rolls straight from the oven, slathered with butter.
Why You'll Love This Recipe
- Five-Ingredient Magic: I swear by this—just yeast, water, flour, sugar, and butter. That’s it. No fancy pantry trips, no stressing over missing herbs or spices. The dough comes together in minutes, and honestly? The simplicity makes it feel like a win every time.
- Golden Butter Bite: The moment those rolls hit the oven, the butter melts into a rich, caramelized crust while keeping the inside soft and pillowy. It’s that perfect contrast—crispy outside, tender inside—that makes them disappear faster than I can say "second round."
- Weeknight Workhorse: I keep a batch in the freezer at all times. Toast them straight from frozen for breakfast, use them to soak up gravy at dinner, or even stuff them with cheese for a quick appetizer. They’re my go-to for lazy nights, potlucks, or whenever I need something reliable.
- Budget-Friendly Staple: A single batch costs pennies and stretches for days. Freeze extras for later, or use day-old rolls to make croutons or French toast. Between us, this is the kind of recipe that makes grocery bills feel less scary—and my pantry feel like a treasure chest.
Step-by-step instructions for soft pillowy bread rolls
Here's how to make tender, fluffy bread rolls that rise perfectly every time.
Activate the Yeast for Perfect Rise
In a small bowl, combine the 1 cup warm water and 1 tablespoon granulated sugar. Sprinkle the 2.25 teaspoons active dry yeast on top and let it sit for 5-10 minutes until it becomes frothy. You'll know it's ready when bubbles form on the surface and fill the bowl.
If the yeast doesn't activate, it's likely too old or the water wasn't warm enough. The ideal temperature is 110°F—not too hot to kill the yeast, not too cold to keep it dormant. This step ensures your rolls rise properly and develop that light, airy texture we're after.
Mix the Dough Until Smooth
In a large mixing bowl, combine the 4 cups all-purpose flour and 1 teaspoon salt. Add the yeast mixture, 0.5 cup softened unsalted butter, 1 whole large egg, and 0.25 cup warm milk. Mix with a wooden spoon until a shaggy dough forms.
Once the dough comes together, turn it out onto a lightly floured surface and knead for 5-7 minutes until smooth and elastic. You'll know it's ready when it springs back slowly when poked. This kneading develops gluten, which gives your rolls their signature soft, pillowy texture. If the dough feels too sticky, add 1 tablespoon flour at a time until it's workable.
Let the Dough Rise Until Doubled
Lightly grease a large bowl with 1 tablespoon vegetable oil, place the dough inside, and cover with a clean kitchen towel. Let it rise in a warm place for 1-1.5 hours or until it has doubled in size. You'll see it puff up noticeably and feel light when pressed gently with a finger.
This rising step is crucial—it's what creates those air pockets that make the rolls so tender. I like to place the bowl near a warm oven with the light on, or even in a slightly warmed oven (100°F) for consistent results. Don't rush this step; patience here pays off with perfect texture.
Shape and Second Rise for Fluffy Rolls
Punch down the risen dough to release air, then divide it into 12 equal pieces. Roll each piece into a smooth ball, about 2 inches in diameter. Arrange them in a greased 9x13-inch baking dish, leaving about 1 inch between each roll. Cover again and let them rise for 30-45 minutes until they've puffed up noticeably.
For even more flavor, sprinkle the tops with 1 tablespoon sesame seeds before the final rise. This step ensures your rolls maintain their shape while developing that perfect pillowy texture. The second rise is shorter because the dough is already partially risen from the first proofing.
Bake Until Golden and Crisp
Preheat your oven to 375°F. Bake the rolls for 15-18 minutes until they're golden brown on top and sound hollow when tapped on the bottom. The edges should pull away slightly from the baking dish, and they'll smell wonderfully fresh.
For extra browning, you can brush the tops with a little milk before baking. Let the rolls cool in the pan for 5 minutes, then transfer to a wire rack. Serve warm—these rolls are best enjoyed fresh out of the oven with butter melting on top. The secret to their perfect texture is that second rise and gentle baking process.
Pro Tips For Making Basic Bread Roll
- Test Yeast First: Sprinkle that active dry yeast into ¼ cup of warm water with a pinch of sugar—if it bubbles within 5 minutes, you’re good to go. I learned this the hard way after baking a batch of flat rolls because my yeast had gone bad; now I check it every time, especially in humid kitchens.
- Salt Early, Knead Well: Toss in the salt with the flour at the start, not after mixing—it dissolves better and distributes evenly. After kneading, your dough should spring back slowly when poked; if it sticks to your fingers, you’re not there yet. I used to rush this, and my rolls ended up dense.
- Butter Matters: Use cold unsalted butter cut into small cubes—it melts slowly during shaping, creating steam for a lighter roll. Skip the softened butter, or you’ll end up with greasy dough that won’t hold its shape. My grandmother swore by this, and she was right: the texture is noticeably better.
- Shape Fast, Rise Slow: Roll those dough balls into neat rounds within 10 minutes of each other—they’ll rise evenly. Then, let them proof in a barely warm spot (like a turned-off oven with a cup of hot water) for 45 minutes, not 20. I was skeptical until I tried it: the rolls rose higher and stayed soft longer.
Dietary considerations for this dish
Gluten-Free Adaptation
For a gluten-free version, replace the 4 cups all-purpose flour with a 1:1 gluten-free flour blend like King Arthur Measure for Measure or Bob’s Red Mill 1-to-1. Add 1 teaspoon xanthan gum to mimic gluten’s elasticity.
Use ½ cup warm milk (or dairy-free alternative) and ¼ cup melted butter instead of softened. Let the dough rest 10 minutes after mixing to hydrate fully—gluten-free doughs are trickier to handle. Proof times may vary, so check for doubled size after 1-1.5 hours. 🌱
Dairy-Free Options
Skip the butter and milk by using ½ cup olive oil or vegan butter (like Miyoko’s) and ¼ cup warm unsweetened almond milk. The dough will still be tender, though slightly denser.
For extra richness, add 1 tablespoon nutritional yeast to the dough—it adds a cheesy depth without dairy. Brush baked rolls with melted coconut oil instead of butter for serving. 🥛
Low-Carb/Keto Version
Transform this into a keto-friendly roll by swapping flour for 1 cup almond flour and 1 cup coconut flour (measure carefully—coconut flour absorbs more liquid). Use 2 extra egg whites to bind and reduce milk to 2 tablespoons.
The dough will be crumbly, so wet your hands when shaping. Bake at 350°F for 18-20 minutes—these rolls are denser but still delicious with butter or whipped cream. 🥑
Allergen-Friendly Swaps
For nut-free keto rolls, use sunflower seed flour instead of almond flour. Egg allergies? Replace eggs with 1 tablespoon ground flaxseed + 3 tablespoons water (let sit 5 minutes to thicken).
Always check labels—some gluten-free blends contain dairy or nuts. I keep Simple Mills almond-free flour blends on hand for safe baking. Test small batches first to adjust textures. 💡
Soy-Free Considerations
Most bread rolls contain no soy, but some gluten-free blends or commercial yeast products might. Opt for certified soy-free yeast like Red Star Vegetarian Yeast (check ingredients). Avoid soy-based shortenings—stick to butter, coconut oil, or lard.
For extra insurance, use a dedicated gluten-free baking kit like Cup4Cup, which guarantees soy-free formulations. Always read labels carefully. 🧂
Nutrition facts
Frequently asked questions
Why do my bread rolls turn out dense instead of fluffy?
Dense rolls usually mean the yeast didn't activate properly or the dough didn't rise enough. First, check your yeast—it should bubble within 5-10 minutes in warm water. If not, your yeast may be old. Also, ensure the dough doubles in size during proofing (about 1-1.5 hours). A warm spot (like near your oven with the light on) helps speed this up. Over-kneading can also tighten the gluten, so knead just until smooth (5-7 minutes).
Can I make these bread rolls without a stand mixer?
This recipe works perfectly by hand. After mixing the dough in a bowl, turn it onto a lightly floured surface and knead for 5-7 minutes until smooth. Wet your hands slightly if the dough sticks—this keeps it from drying out. The key is consistent pressure and folding the dough over itself to develop gluten. No mixer needed for these soft, pillowy rolls!
How do I store leftover bread rolls to keep them fresh?
Freshly baked rolls stay soft for 3 days if wrapped in a clean kitchen towel and stored in an airtight container. For longer storage, freeze them after they've cooled completely. Place rolls in a single layer on a tray, freeze until solid, then transfer to a bag. Thaw at room temperature before serving. Reheat in a 350°F oven for 5-7 minutes to restore that warm, fresh-from-the-oven texture.
What can I do if my dough doesn't rise at all?
If your dough stays flat, check these common issues first: The water might be too hot (should be 110°F, like bathwater) or too cold. Old yeast or expired flour can also kill fermentation. Try activating fresh yeast in ½ cup warm water + 1 tsp sugar—if it doesn't bubble in 10 minutes, toss it. For a quick fix, use 1 packet instant yeast (no need to proof) or place the dough in a warm oven (100°F) with a bowl of hot water nearby to encourage rising.
Can I make these rolls ahead of time for a meal?
Yes! Shape the rolls and refrigerate them overnight (unrisen) for a slower rise the next day. Let them sit at room temperature for 30 minutes before the final 30-45 minute rise. For a party, bake them 1 day ahead, cool completely, then freeze. Reheat in a 300°F oven for 10 minutes wrapped in foil. The rolls will be slightly drier but still delicious—perfect for sandwiches or serving with soup.