
Appetizers
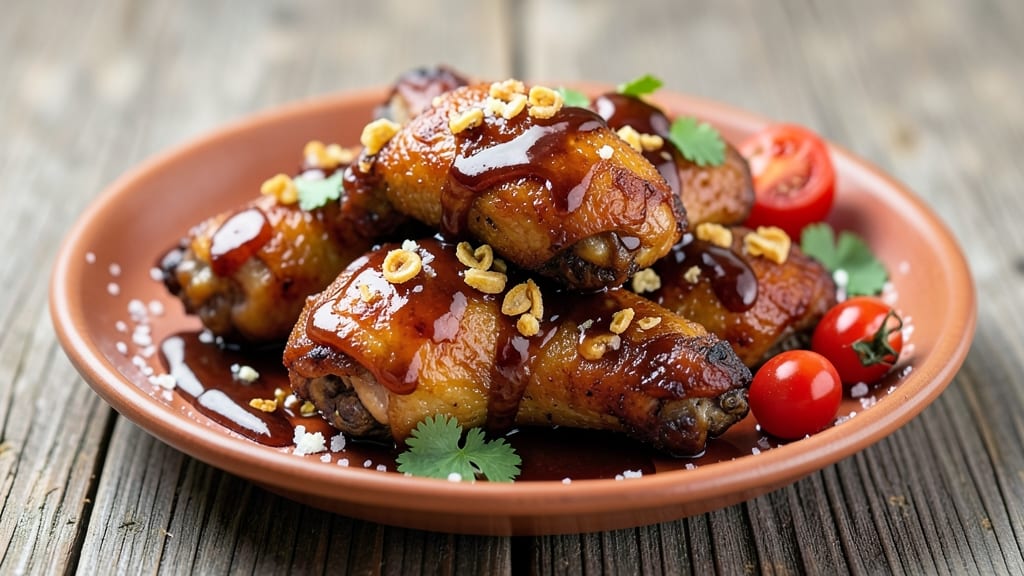
This baked honey BBQ wings recipe delivers the perfect balance of crispy skin and sticky-sweet glaze without a single trip to the deep fryer.
I developed it after years of perfecting my pitmaster skills—combining the smoky depth of traditional BBQ with the tenderizing power of honey for wings that are impossible to resist. The secret lies in a two-stage baking process that ensures crispy edges while keeping the meat juicy inside.
What makes this recipe truly special is the honey BBQ glaze—a perfect marriage of tangy tomato sauce and rich honey that caramelizes beautifully during baking. Unlike traditional fried wings, these bake in the oven, creating a crispy skin that holds up perfectly to the sticky glaze.
The process is straightforward but delivers restaurant-quality results every time, with minimal effort and maximum flavor.
By the time you pull these wings from the oven, you'll have golden-brown skin that shatters with every bite, paired with a glaze so rich it clings to each piece.
The sweetness of the honey balances the smoky tang of the BBQ sauce, creating a flavor profile that's both complex and irresistibly delicious. These wings are perfect for game day gatherings, family dinners, or whenever you're craving something that tastes like it came from a professional kitchen.
Serve them with extra glaze for dipping or pair with classic sides like celery sticks and ranch dressing. The best part? This recipe makes enough for a crowd, so you'll have leftovers to enjoy for days. Let's get started on these wings that will have everyone asking for seconds!
Ingredients for baked honey bbq wings
Crispy wings with a sticky, sweet glaze—no fryer needed. Just these ingredients and your oven.
| Ingredient | Amount | Notes |
|---|---|---|
| Chicken Wings 🍗 | 3 lb | Split into drumettes and flats, tips removed |
| Honey 🍯 | ½ cup | Pure, thick honey preferred |
| BBQ Sauce 🍅 | 1 cup | Store-bought or homemade, tangy preferred |
| Ketchup 🍅 | ¼ cup | For glaze thickness |
| Apple Cider Vinegar 🍎 | 1 tbsp | For tangy balance |
| Garlic Powder 🧄 | 1 tsp | Freshly ground preferred |
| Onion Powder 🧅 | 1 tsp | For depth of flavor |
| Smoked Paprika 🌶️ | 1 tsp | For smoky richness |
| Salt 🧂 | 1 tsp | Kosher or sea salt |
| Black Pepper 🌶️ | ½ tsp | Freshly cracked |
| Olive Oil 🫒 | 2 tbsp | For crispy skin |
| Cornstarch 🌾 | 1 tbsp | For extra crispiness |
| Hot Sauce 🔥 | 1 tbsp | Optional, for heat |
The wings are the star, so pick fresh, high-quality ones—look for plump, meaty pieces with minimal fat. Costco or Trader Joe's often have great deals on bulk wings. If you can't find them pre-split, grab whole wings and separate the drumettes and flats yourself. The difference in texture is worth the extra minute. For the glaze, honey matters most—avoid the thin, runny kind. Grab a thick, pure honey like Manuka or clover. The BBQ sauce should have a good balance of tang and sweetness—Sweet Baby Ray's or Stubb's are solid choices if you're buying store-bought.
No honey? Maple syrup works in a pinch, but the flavor won't be quite the same. Short on BBQ sauce? Mix ketchup with a splash of vinegar and smoked paprika for a quick substitute. The cornstarch is non-negotiable for that perfect crispy skin—it's what makes these wings feel like they're fried. If you want extra heat, Frank's RedHot or Tabasco are my go-tos. For the glaze, if you're making it ahead, store it in the fridge and warm it slightly before brushing on the wings—it'll be way easier to work with.
These wings reheat beautifully—just pop them back in the oven at 400°F for 5-10 minutes until heated through. They keep in the fridge for 3-4 days, but honestly, they're so good you won't have leftovers. For game day, make a double batch and freeze half. Portion them into ziplock bags with parchment paper between layers so they don't stick. They freeze for up to 3 months and taste just as good as fresh!
Why You'll Love This Recipe
- One-Pan Magic: The wings go straight from raw to golden—no deep-frying mess, no sticky grills. Just toss them on a sheet pan with the honey-BBQ glaze, and the oven does all the work while you sip your drink.
- Sweet-Savory Crunch: That sticky honey glaze caramelizes into crispy bits, while the apple cider vinegar cuts through the sweetness. Honestly, the first bite makes me forget I was ever tempted by takeout.
- Game Day Staple: Serve them at tailgates, Super Bowl parties, or even a lazy Sunday with the family. They’re hearty enough to satisfy a crowd but simple enough that no one will complain about the prep.
- Budget-Friendly Feast: A pound of wings and a few pantry staples feed four for under $12. Plus, leftovers reheat like a dream—crispy edges intact, no soggy wings in sight. My wallet and my taste buds win.
Step-by-step instructions for baked honey BBQ wings
Here's the foolproof method for irresistibly crispy wings with that perfect sticky-sweet glaze.
Prepare the Wings for Maximum Crispiness
Preheat your oven to 425°F for maximum crispiness. Pat the 3 lb chicken wings completely dry with paper towels—this is non-negotiable for crispy skin. You want them bone-dry, not just damp. Place the wings on a rimmed baking sheet lined with parchment paper, making sure they're in a single layer and not touching.
In a small bowl, whisk together 2 tbsp olive oil, 1 tbsp cornstarch, 1 tsp salt, 0.5 tsp black pepper, 1 tsp garlic powder, 1 tsp onion powder, and 1 tsp smoked paprika. This dry rub is what creates that perfect crispy exterior while adding depth of flavor. Toss the wings in the oil mixture until they're evenly coated, shaking off any excess. The cornstarch helps create that irresistible crunch we're after.
Bake Until Golden and Crispy
Bake the wings for 35 minutes, flipping them halfway through at the 17-minute mark. You'll know they're ready when they're deep golden brown and the skin is crispy to the touch. Don't peek too early—the heat needs to circulate properly for that perfect texture. If you notice any areas browning too quickly, rotate the pan for even cooking.
This initial baking step is crucial. It develops that crispy skin before we add the glaze. The wings should be fully cooked through at this point, with no pink remaining when you cut into a piece at the joint. Remove them from the oven and let them cool slightly on a wire rack for 5 minutes—this prevents the glaze from steaming instead of sticking.
Create the Sticky-Sweet Glaze
While the wings are cooling, combine 0.5 cup honey, 1 cup BBQ sauce, 0.25 cup ketchup, 1 tbsp apple cider vinegar, and 1 tbsp hot sauce in a medium bowl. Whisk vigorously until fully blended—the honey should be completely incorporated with no visible streaks. This glaze is what makes these wings so addictive, with that perfect balance of sweet, tangy, and smoky flavors.
For extra stickiness, you can microwave the glaze for 15-20 seconds to slightly thin it out. The glaze should coat the back of a spoon but still be pourable. If it's too thick, add 1 teaspoon water at a time until it reaches your desired consistency. The vinegar adds that perfect tang that cuts through the sweetness, while the hot sauce adds just a hint of heat if you want it.
Coat and Bake to Glossy Perfection
Return the oven to 425°F (no need to preheat again). Working quickly, toss the cooled wings in the glaze until they're completely coated. You'll want to do this in batches if you don't have a large enough bowl—just make sure each wing gets an even coating. Place them back on the baking sheet in a single layer and return to the oven.
Bake for an additional 10-12 minutes until the glaze is bubbling and the wings have that beautiful glossy finish. You're looking for a deep amber color with that irresistible sticky appearance. The wings should be fully coated in glaze, with no dry spots. For the final touch, broil for 1-2 minutes at the very end to caramelize the glaze slightly—just watch them closely to prevent burning.
Rest and Serve with Confidence
Remove the wings from the oven and let them rest for 3-5 minutes before serving. This resting period allows the glaze to set slightly and makes them easier to handle. The wings should be crispy on the outside with that perfect sticky glaze, and tender yet firm on the inside. If you're serving them with celery and carrot sticks, you might want to let them cool slightly longer to prevent burning your fingers.
Serve immediately with your favorite dipping sauces or extra glaze on the side. These wings are best enjoyed fresh out of the oven when the glaze is still warm and sticky. The combination of crispy skin and that sweet-tangy glaze makes each bite irresistible. Trust me, once you try these, they'll become a regular feature at your game days and gatherings!
Pro Tips For Making Baked Honey Bbq Wings
- Bake in Two Stages: Start wings at 425°F for 25 minutes—this sears them fast and locks in moisture. Then drop to 375°F for the remaining 15-20 minutes while the sauce cooks down. I used to bake them all at high heat, and they’d dry out by the time the sauce caramelized.
- Whisk the Sauce Cold: Mix your honey, BBQ sauce, ketchup, and vinegar before heating—cold ingredients blend smoother. I learned this after clumping honey ruined three batches. A splash of warm water thins it if needed, but start with a proper whisk.
- Skip the Crowding: Wings need airflow to crisp. Arrange them in a single layer on the tray, even if it means two batches. I crammed them once and ended up with soggy, unevenly cooked wings—your oven isn’t a magic dehydrator.
- Deglaze the Pan First: After searing (if you’re browning them), splash in 2 tablespoons apple cider vinegar and scrape up the fond. Toss the wings in this sticky liquid before baking—it adds depth to the sauce and cuts the sweetness. Yes, it’s an extra step, but it’s worth it.
Dietary considerations for this baked honey bbq wings
Gluten-Free Adaptations
This recipe is naturally gluten-free, but I always recommend checking your BBQ sauce label—many contain hidden wheat or barley. I use Annie's Organic BBQ Sauce or Primal Kitchen for a certified gluten-free option.
The cornstarch in the dry rub can be swapped for arrowroot powder if you're avoiding all corn products. Just keep the same 1 tbsp measurement for that crispy texture. 🌾
Dairy-Free Considerations
The original recipe doesn't contain dairy, but if you're serving these wings at a mixed-diet gathering, I suggest setting out a separate ranch dressing made with dairy-free alternatives.
Brands like Kite Hill or Forager Project create creamy, tangy options that pair perfectly. The honey BBQ glaze itself is completely dairy-free, so no modifications are needed there.
Low-Sugar Options
For those watching sugar intake, reduce the honey to ¼ cup and add 1 tbsp monk fruit sweetener to maintain sweetness without the glucose spike. I've also had success using Swerve granulated sweetener in a 1:1 ratio with honey.
The vinegar and hot sauce will still provide that necessary tang to balance any reduced sweetness. The wings will be slightly less sticky but still delicious.
Spicy Variations
If you want to add heat without extra sugar, increase the hot sauce to 2 tbsp and add ½ tsp cayenne pepper to the dry rub. For a smoky kick, swap out half the BBQ sauce for chipotle powder mixed with 1 tbsp apple cider vinegar.
I like to keep a small bowl of chili-lime salt on the table for guests who want extra heat with each bite. 🌶️
Protein Swaps
For a lighter option, use chicken tenders instead of wings—they cook faster and still get that crispy texture. If you're vegetarian, cauliflower wings work surprisingly well with this glaze. I recommend Simple Mills almond flour wings for a meaty texture.
For a seafood twist, try shrimp skewers with the same glaze—just reduce cooking time to 8-10 minutes total.
Allergen-Friendly Tips
Always verify your honey source if nut allergies are a concern—some honey may be processed in facilities handling tree nuts. For soy-free diets, check your BBQ sauce ingredients as many contain soy lecithin.
I keep Primal Kitchen BBQ sauce on hand as it's free from top allergens. When serving, label your dish clearly with allergen information to keep everyone safe and satisfied.
Nutrition facts
Frequently asked questions
Can I make these wings ahead of time?
These wings reheat beautifully. Prepare them up to 2 days in advance and store in an airtight container in the fridge. Reheat at 400°F for 10-12 minutes until warmed through. For longer storage, freeze them for up to 3 months—just thaw overnight in the fridge before reheating.
Why does my glaze turn out too runny?
Thin glaze happens when the honey isn't fully incorporated or the mixture is too warm. First, whisk the glaze vigorously until smooth. If still too thin, simmer it in a small saucepan for 3-5 minutes to reduce the liquid. For extra thickness, add ½ tsp cornstarch mixed with 1 tsp water and stir until bubbly.
How do I get extra crispy skin without frying?
The cornstarch in the dry rub is your secret weapon! Pat the wings completely dry before baking, and don't skip the 5-minute rest after the first bake. For even more crispiness, broil for 1-2 minutes at the very end. Also, use a wire rack over a baking sheet to allow air circulation on all sides.
Can I use this glaze on other meats?
This sticky-sweet glaze works beautifully on chicken thighs, ribs, or even shrimp skewers! For ribs, apply the glaze after the initial smoke and bake at 275°F for 1.5 hours with foil. For shrimp, reduce cooking time to 8-10 minutes total—they cook much faster than wings.
What's the best way to serve these wings?
Serve them immediately with extra glaze for dipping and classic sides like celery sticks, carrot sticks, and cool ranch dressing. For a fun presentation, arrange them on a platter with toothpicks and sprinkle with chopped green onions. Keep a small bowl of blue cheese dressing or spicy mayo on the side for variety.