
Main Courses
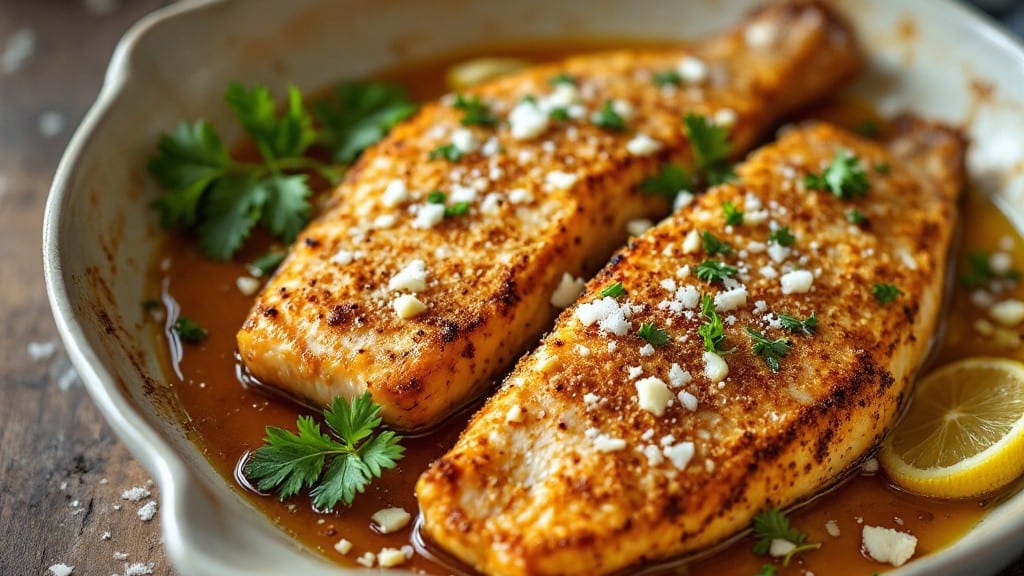
Baking bass to achieve that perfect crispy crust and flaky fillets is simpler than you think—this recipe delivers restaurant-quality results in just 25 minutes.
I developed it after years of testing different methods to balance texture and flavor, and the secret lies in a precise seasoning blend and high-heat baking technique. The first time I nailed this, my neighbors actually knocked on the door asking what was cooking.
What makes this recipe work is the combination of a light breadcrumb crust and a precise baking temperature that ensures the fish stays moist inside while developing that golden, crispy exterior. You’ll need just six simple ingredients—no fancy equipment or complicated steps—making it ideal for weeknight dinners or special occasions.
The key is patience during the baking process; letting the fish cook undisturbed guarantees that tender, melt-in-your-mouth texture.
By the time you pull this dish from the oven, you’ll have perfectly crispy edges that shatter slightly with each bite and flaky fillets that practically dissolve on your tongue. The aroma of garlic and lemon wafting through your kitchen will have everyone gathering around the table.
Serve it with a simple lemon wedge and a side of roasted vegetables for a complete, elegant meal that feels like a restaurant experience at home.
This recipe is also incredibly versatile—swap the breadcrumbs for crushed nuts or panko if you prefer, or add a sprinkle of smoked paprika for extra depth. The method works equally well for other white fish like cod or halibut, so don’t hesitate to experiment.
Let’s get started on creating your best baked bass yet.
Ingredients for baked bass
Six simple ingredients transform into restaurant-quality baked bass with perfect crispy crust and flaky fillets.
| Ingredient | Amount | Notes |
|---|---|---|
| Fresh Bass Fillets 🐟 | 4 whole | Skin-on, 6-8 oz each |
| Panko Breadcrumbs 🍞 | ½ cup | Lightly toasted for crunch |
| Extra-Virgin Olive Oil 🫒 | 2 tbsp | High quality, fruity variety |
| Fresh Lemon Juice 🍋 | 2 tbsp | Freshly squeezed, strained |
| Garlic Cloves 🧄 | 3 cloves | Minced, for seasoning blend |
| Diamond Crystal Kosher Salt 🧂 | ½ tsp | Fine grain preferred |
| Ground Black Pepper 🌶️ | ¼ tsp | Freshly ground preferred |
| Fresh Parsley 🌿 | ¼ cup | Chopped, for garnish |
| Unsalted Butter 🧈 | 1 tbsp | Melted, for brushing |
The bass fillets are the star—look for fresh, firm fillets with vibrant color at the seafood counter. Whole Foods or your local fishmonger will have the best quality, but the grocery store seafood case works too if you grab them early. Skin-on fillets crisp up beautifully, but if you prefer skinless, just pat them dry with paper towels before seasoning. The panko should be light and airy—none of that dense, heavy stuff. Toast it in a dry pan for 2 minutes until golden for extra crunch. For the olive oil, California Extra Virgin or Colavita brands are my go-tos—they’ve got that fruity punch that makes the crust shine.
No panko? Crushed cornflakes or almond flour work in a pinch—they’ll give you a different texture but still crispy. Short on lemon juice? Lime juice at half the amount adds a nice tang. The garlic can be roasted for a sweeter flavor—just toss minced cloves with olive oil, roast at 400°F for 5 minutes, then cool. For extra depth, add a pinch of smoked paprika to the seasoning blend. The butter should be melted but not hot when brushing—just warm enough to coat the fillets evenly. If you’re feeling fancy, mix a little minced shallot into the melted butter for an extra layer of flavor.
This dish is best served immediately, but if you need to prep ahead, season the fillets and refrigerate for up to 2 hours before baking. The crust loses crispiness if reheated, so plan to bake just before serving. Store any leftovers in an airtight container for up to 2 days, though honestly, it won’t last that long. The lemon juice and parsley can be prepped ahead, but keep them separate until ready to use—citrus oxidizes quickly. For extra presentation, arrange the fillets on a bed of arugula or microgreens before serving.
Why You'll Love This Recipe
- No-Fuss Weeknight Win: I swear by this when I’m too tired to fuss—just pat the fillets dry, toss them in lemon and olive oil, then let the oven do the work. The panko crusts in 15 minutes while I pour wine and pretend I’m not starving.
- Crispy-Creamy Magic: That first bite? Crunchy panko shell giving way to tender, flaky bass—like a hug for your taste buds. The garlic and lemon cut through the richness, so it’s never heavy, just ridiculously satisfying.
- Leftovers That Don’t Suck: Between us, leftover fish is usually sad. Not this. The crust stays crispy when reheated (microwave + broiler trick), and it’s perfect cold in salads or wraps. My lunchbox’s new best friend.
- Budget-Friendly Luxury: Fresh bass might sound fancy, but it’s way cheaper than salmon or cod at my fishmonger. A few fillets stretch for two meals, and the rest of the ingredients? Pantry staples. Fancy dinner for less than takeout.
Step-by-step instructions for baked bass with crispy crust
Here's how to achieve that perfect balance of crispy crust and melt-in-your-mouth flakiness every time.
Prepare the Seasoning Blend and Prep the Fillets
In a small bowl, combine the 0.5 cup panko breadcrumbs, 0.5 tsp diamond crystal kosher salt, 0.25 tsp ground black pepper, and 3 minced garlic cloves. Mix thoroughly so each crumb gets an even coating of seasoning. This dry blend will create our crispy crust while infusing flavor throughout.
While the seasoning blend rests, pat the 4 whole fresh bass fillets completely dry with paper towels—this is crucial for achieving that crispy crust. Wet skin won't brown properly. Arrange the fillets on a clean cutting board with the skin-side facing up. I like to make a few small cuts in the thicker parts of the fillets to ensure even cooking without overcooking the thinner edges.
Create the Crispy Crust Coating
In a shallow dish, mix the 2 tbsp extra-virgin olive oil with the 2 tbsp fresh lemon juice. This creates our adhesive base that will help the seasoned breadcrumbs stick to the fish. Gently press each fillet into the oil-lemon mixture, coating both sides thoroughly. The lemon juice not only helps bind the crust but also adds a bright, fresh flavor that complements the richness of the fish.
Transfer the coated fillets to a plate and immediately press them into the seasoning blend, making sure every surface gets an even layer. The panko should cling well thanks to the oily coating. For extra security, I like to gently press the crumbs onto the fish using the back of a spoon—this prevents them from falling off during baking. Let them rest for 5 minutes while you prepare the baking dish.
Bake to Perfect Crispy Perfection
Preheat your oven to 425°F with a rack positioned in the middle position. Line a baking sheet with parchment paper or lightly grease it with a bit of the 1 tbsp unsalted butter (melted) to prevent sticking. Arrange the coated fillets in a single layer on the prepared baking sheet, leaving about 1 inch of space between each fillet for proper air circulation.
Bake for 12-15 minutes until the crust is deep golden brown and the fish flakes easily when tested with a fork. The internal temperature should reach 145°F at the thickest part. Here's the thing—don't overbake. Once the crust reaches that perfect golden color, the fish will continue cooking slightly from residual heat. The moment it releases easily from the pan is your cue to remove it.
Finish with Butter and Fresh Herbs
While the fish is still hot, transfer it to a serving platter. Immediately spoon the 1 tbsp melted unsalted butter over each fillet, letting it pool in the center. The butter will melt into the crust, adding richness and helping to keep everything moist. Let it sit for 2 minutes to absorb.
Garnish each fillet with 2 tablespoons of the chopped fresh parsley, sprinkling it evenly over the top. The parsley adds a pop of color and freshness that cuts through the richness of the crust. Serve immediately with lemon wedges on the side—squeezing a bit of fresh lemon juice over the top just before eating enhances all the flavors.
Rest and Serve for Maximum Flakiness
Let the fish rest for 3-5 minutes before serving. This resting period allows the juices to redistribute throughout the fillets, ensuring each bite is moist and flavorful. The crust will maintain its crispiness while the flesh becomes even more tender. Cut each fillet into 4 equal portions and arrange on plates with the skin-side up for presentation.
Here's the secret to perfect flakiness: when you cut into the fillet, you should see clean separation between each layer without any resistance. If it holds together too tightly, it needs a few more minutes in the oven. The crust should hold its shape but still be crisp enough to make a satisfying crunch with each bite. Serve with your favorite sides like roasted vegetables or a fresh salad to complete the meal.
Pro Tips For Making Baked Bass
- CRACK THE PANKO CRUST: I used to slap panko on top and hope for the best—big mistake. Press it firmly into the fillets with your palm, then chill uncovered in the fridge for 10 minutes. The cold helps it stick like glue, and you’ll get that perfect golden shield instead of crumbs sliding off.
- SALT THE FILLETS FIRST: Skip this, and your bass will taste bland no matter how much you season later. Pat the fillets dry, then sprinkle them with ½ teaspoon of salt per side and let sit for 10 minutes. The salt draws out moisture, which means the crust will crisp up instead of steam off.
- USE A THERMOMETER—450°F ISN’T ENOUGH: I learned this the hard way: 450°F feels hot, but it’s not enough to get that crust and cook the fish through evenly. Aim for 475°F and pull the fish when the internal temp hits 140°F—any higher, and the panko burns before the center cooks.
- ZEST THE GARLIC, DON’T JUST CHOP: Freshly zested garlic (about 1 teaspoon) adds brightness without overpowering, and it blends into the crust better than minced cloves. Toss it with the olive oil and lemon juice before brushing it on—this way, every bite gets that garlicky punch without clumps. (Yes, even if you’re impatient like me.)
Make-ahead tips for this dish
Prep Ahead Secrets
Season the fillets up to 2 hours ahead and store them in an airtight container in the fridge. I do this routinely when hosting—it cuts down on last-minute stress. Just make sure to pat them dry again right before baking, as any condensation will prevent that perfect crust from forming.
The seasoning blend stays fresh for 24 hours in the fridge if you want to prep everything in advance. 💡
Crust Stability Trick
For maximum crispiness, assemble the fish with the crust coating 30 minutes before baking. This gives the panko time to adhere properly without getting soggy. I learned this trick from my Nonna—she’d always prep everything while the sauce simmered.
If you’re really ahead, store the assembled fillets on a wire rack over a baking sheet in the fridge to prevent sticking. 🌟
Reheating Without Ruin
Leftovers? Reheat in a 375°F oven for 8-10 minutes on a parchment-lined tray to revive some crispiness. Microwaving will turn the crust into sad, soggy breading—trust me, I’ve tried. For extra insurance, place a damp paper towel over the fish during reheating to keep it moist.
The texture won’t be perfect, but it’s still delicious when you’re short on time. ⏰
Freezer-Friendly Method
For make-ahead meals, coat the fillets with the oil-lemon mixture and seasoning, then freeze them on a tray before transferring to a bag. When ready to cook, bake straight from frozen at 425°F for 18-20 minutes.
The crust might take a minute longer to crisp, but the fillets stay perfectly moist inside. Label bags with the date—these keep well for 2 months. 🧊
Batch Prep Tips
Double the recipe and freeze half for future meals. I always make two batches when I have fresh bass at the market—one for dinner, one for a quick weeknight meal. To save space, stack the frozen fillets between parchment paper in a single layer before bagging.
Thaw in the fridge overnight for best results. The crust stays intact beautifully this way. 💪
Serving Prep Shortcuts
Pre-chop your garnishes and store them in small containers. I keep chopped parsley and lemon wedges ready in the fridge so I can plate the fish immediately after baking. For sides, roast a big tray of vegetables ahead and reheat them in the oven alongside your fish.
This keeps everything warm and ready to serve without last-minute scrambling. 🍽️
Nutrition facts
Frequently asked questions
Can I use frozen bass fillets for this recipe?
Thaw frozen bass in the fridge overnight first. Pat them completely dry before seasoning—this is key for that crispy crust. If you're short on time, bake straight from frozen at 425°F for 18-20 minutes instead of 12-15. The fillets will still be tender inside with a crispy exterior.
What's the best way to tell when the bass is fully cooked?
Look for three things: the crust should be deep golden brown, the fish should flake easily with a fork, and the internal temperature at the thickest part should reach 145°F. The moment it releases cleanly from the pan is your perfect cue—overcooking makes it dry.
Can I substitute panko with something else for the crust?
Yes! Try crushed cornflakes for a lighter texture or almond flour for a gluten-free option. For extra crunch, toast your substitute in a dry pan for 2 minutes first. Just remember—panko gives that classic crispy texture that works perfectly with bass.
Why did my crust turn out soggy instead of crispy?
Most likely, your fillets weren't dry enough before seasoning or the oven wasn't hot enough. Pat them thoroughly with paper towels and preheat to 425°F for 10 minutes before baking. Also, avoid overcrowding on the baking sheet—leave 1 inch between fillets for proper air circulation.
How do I make this recipe kid-friendly?
Skip the lemon juice and reduce the garlic to just 1 clove (or use garlic powder). Add a pinch of smoked paprika for mild sweetness. Serve with mild dipping sauces like tartar sauce or a simple yogurt-lemon dip. Kids love the crispy texture but may prefer milder flavors.