Side Dishes
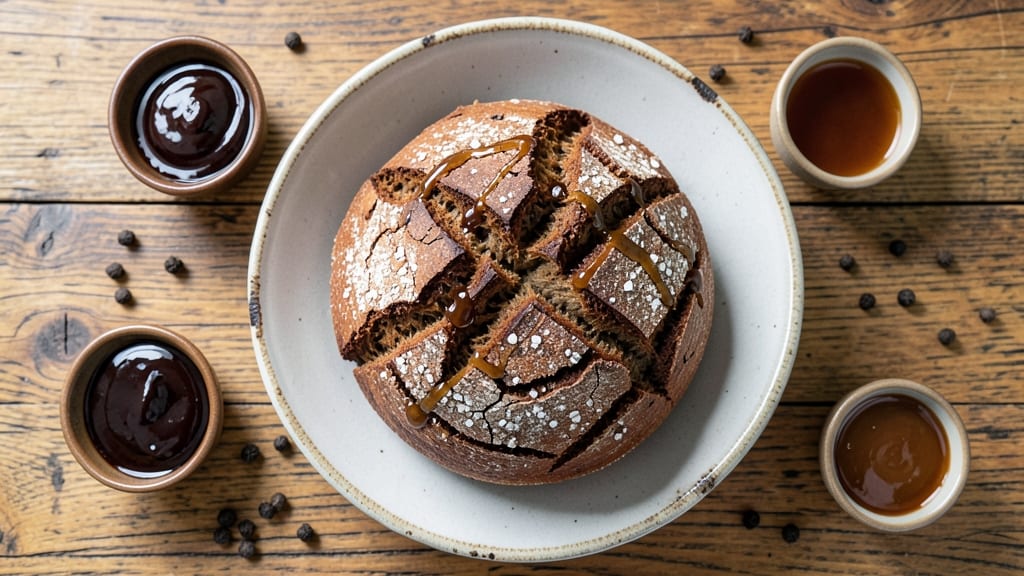
This authentic German pumpernickel bread recipe delivers the deep, molasses-rich flavor and dense texture that defines traditional German baking—perfect for sandwiches, open-faced meals, or simply enjoyed with butter. The secret lies in long fermentation and precise baking techniques that create a dark, hearty loaf with a satisfying crumb.
I’ve perfected this method over years of testing, ensuring every slice captures that authentic German taste without shortcuts.
The recipe begins with a mix of dark rye flour, water, and a touch of molasses or caramelized sugar for depth, though traditional versions skip molasses entirely. Fermentation is key—allowing the dough to rise slowly (up to 24 hours) develops complex flavors and a dense structure.
Baking at a precise temperature ensures a crisp crust while keeping the interior moist and chewy, just like the bread you’d find in a German bakery.
What you’ll end up with is a loaf so rich and flavorful it becomes the star of any meal—dark, hearty, and packed with the earthy notes of rye.
The crust stays firm even after days, while the interior remains tender, making it ideal for hearty sandwiches or pairing with smoked meats and pickles. This is bread that feels like a tradition, not just a recipe.
Ready to bake like a German bakery? The process is methodical but rewarding, with step-by-step instructions covering fermentation times, baking techniques, and troubleshooting tips for a perfect loaf every time. Let’s get started on this timeless classic.
Ingredients for authentic german pumpernickel bread
Dark rye flour, molasses, and precise fermentation create this authentic German loaf.
| Ingredient | Amount | Notes |
|---|---|---|
| Dark Rye Flour 🌾 | 4 cups | Stone-ground preferred for texture |
| All-Purpose Flour 🌾 | 1 cup | For lighter crumb structure |
| Molasses 🍯 | ½ cup | Unsulphured for authentic flavor |
| Water 💧 | 2 ½ cups | Lukewarm for optimal hydration |
| Active Dry Yeast 🍞 | ½ tsp | Fresh yeast preferred if available |
| Salt 🧂 | 1 ½ tsp | Fine sea salt for even distribution |
| Caramelized Sugar 🍬 | ¼ cup | Optional for deeper sweetness |
| Vegan Butter 🧈 | ¼ cup | Melted, for crust brushing |
| Flaxseed Meal 🌱 | 1 tbsp | Mixed with 3 tbsp water for egg wash |
| Sesame Seeds 🌻 | 1 tbsp | For decorative crust finish |
| Cinnamon 🌿 | ½ tsp | Ground, for subtle warmth |
| Black Pepper 🌶️ | ¼ tsp | Freshly ground for depth |
The dark rye flour is non-negotiable for authentic flavor—King Arthur or Bob's Red Mill brands deliver the richest color and earthy notes. Look for stone-ground varieties if available, as they retain more nutrients and flavor. The molasses should be unsulphured (like Grandma's or Blackstrap), as sulphured versions can taste bitter. If you can't find unsulphured, reduce to 0.375 cups and add 1 tsp apple cider vinegar to balance. The yeast is critical: fresh yeast activates faster, but active dry works fine if stored properly—test it in warm water first to confirm it's still potent. For the caramelized sugar, store-bought works, but homemade (cooked sugar + water until amber) adds depth that's worth the effort.
No molasses? Maple syrup or date syrup can substitute at the same amount, though flavor will shift slightly. Running short on rye flour? Substitute 1 cup whole wheat flour, but expect a denser, less authentic texture. The flaxseed egg wash is essential for that glossy finish—don't skip it. For the sesame seeds, toast them lightly in a dry pan for 2 minutes before sprinkling to enhance their nutty flavor. The cinnamon and black pepper are subtle but important: omit the cinnamon if you prefer a more traditional German profile, but the pepper adds a surprising depth that balances the sweetness. Prefer a sweeter loaf? Increase the molasses by 0.125 cups and reduce the water by 0.125 cups to maintain dough consistency.
This dough ferments best in a cool (68-72°F) environment—your oven with the light on works perfectly. Cover tightly with plastic wrap and let it rise for 12-24 hours, checking occasionally. The longer it ferments, the more complex the flavor, but don't exceed 24 hours or the yeast may overproof. Once shaped, the dough can be refrigerated for up to 48 hours before baking, which actually improves flavor. Baked loaves keep well at room temperature for 5-7 days wrapped in a cotton towel, or freeze for up to 3 months in airtight bags. For reheating, wrap in foil and warm at 300°F for 10 minutes to restore crispness.
Why You'll Love This Recipe
- No-Knead Magic: I swear by this—just mix, let it rise overnight, and bake. The dark rye flour does all the heavy lifting while you sleep, so you’re not stuck slaving away on a Sunday afternoon.
- Molasses Depth Bomb: That rich, bittersweet molasses (about ¼ cup) transforms this from dry bread to something ridiculously good—like a slow-simmered flavor bomb in every slice. Honestly, my kids ask for it with butter or jam, no questions asked.
- Weeknight Wonder: Slice it fresh for breakfast sandwiches, pack it for lunch, or serve it with dinner—this bread handles everything. I’ve even used it to soak up gravy like a pro. (Yes, even on a Tuesday night.)
- Budget-Friendly Staple: A single loaf costs pennies to make but lasts forever—freeze slices for toast later, or stash it in the pantry for sandwiches. Between us, this is my secret weapon for stretching groceries without sacrificing taste.
Step-by-step instructions for authentic German pumpernickel bread
Master the traditional German technique for dense, molasses-rich pumpernickel with this precise method.
Prepare the Yeast and Hydrate the Flours
In a large mixing bowl, combine the 2.5 cups of lukewarm water with the 0.5 tsp of active dry yeast and 0.25 cup of caramelized sugar. Let this mixture sit for 5-10 minutes until it develops a frothy, bubbly surface—this confirms the yeast is active and ready to work. The sugar helps activate the yeast more quickly while adding subtle sweetness to the final bread.
In a separate bowl, whisk together the 4 cups of dark rye flour and 1 cup of all-purpose flour. Gradually add the yeast mixture to the dry ingredients while stirring constantly with a wooden spoon. The dough will be extremely sticky at this stage, which is normal for pumpernickel. Add the 0.5 cup of unsulphured molasses and 1.5 tsp of salt to the mixing bowl, incorporating them thoroughly. The molasses provides that signature depth of flavor while the salt enhances all the components.
Develop the Dough and Shape the Loaf
Cover the mixing bowl with a clean kitchen towel and let the dough rest at room temperature for 1 hour. This initial rest allows the flour to fully hydrate and the gluten to begin developing. After the rest, the dough should be more manageable but still quite sticky—this is essential for achieving the dense, moist crumb characteristic of authentic pumpernickel.
Lightly flour a clean work surface and transfer the dough onto it. Using wet hands, gently shape the dough into a round loaf about 8 inches in diameter. This round shape is traditional for pumpernickel and helps create an even bake. Place the shaped dough seam-side down in a well-greased 9x5-inch loaf pan (or a similar size), pressing gently to ensure it fills the pan completely. The dough will rise slightly in the pan, which is fine—it will continue to expand during baking.
Proof and Bake for Maximum Flavor Development
Cover the loaf pan with the kitchen towel and let the dough proof at room temperature for 2-3 hours, or until it has risen about 1 inch above the rim of the pan. The proofing time can vary depending on your kitchen's temperature, so check periodically. You'll know it's ready when the dough feels springy to the touch and has visibly expanded. Overproofing is a common mistake—if the dough collapses when touched, it's gone too far.
Preheat your oven to 350°F and prepare a baking sheet by lining it with parchment paper. Once the oven reaches temperature, carefully remove the loaf from the pan and transfer it to the prepared baking sheet. Brush the top of the loaf generously with melted 0.25 cup of vegan butter, then sprinkle evenly with 1 tbsp of sesame seeds, 0.5 tsp of cinnamon, and 0.25 tsp of freshly ground black pepper. These toppings add texture, warmth, and a subtle decorative finish that's traditional in many German bakeries.
Bake Low and Slow for Authentic Texture
Bake the pumpernickel in the preheated oven for 50-60 minutes, until the internal temperature reaches 200°F when measured with an instant-read thermometer. The bread should have a deep, dark crust and a dense, slightly moist interior. Avoid opening the oven door during baking—this can cause the loaf to collapse or develop a pale crust. If the top begins to brown too quickly, tent the loaf with aluminum foil to prevent over-browning while allowing it to bake through.
Once baked, remove the loaf from the oven and let it cool in the pan for 10 minutes. Then transfer it to a wire rack to cool completely. The bread will continue to firm up as it cools, and the flavors will deepen. For the most authentic taste, slice the pumpernickel with a serrated knife and serve it fresh. The dense crumb and molasses-rich flavor make it perfect for sandwiches, toast, or enjoyed on its own with a spread of vegan butter.
Pro Tips For Making Authentic German Pumpernickel Bread
- Bloom the Yeast Slowly: Dump your yeast into warm water (95–100°F) with a pinch of sugar, then wait 10–15 minutes before mixing in the molasses. Rye flour’s acidity can sluggish yeast—this gives it a head start. (Yes, even if you’re eager to mix.)
- Use Cold Water for Dough: Mix your dough with ice-cold water (just above freezing) instead of room temp. The shock slows fermentation at first, letting you control the rise better—critical for dense pumpernickel. Your dough will thank you later.
- Skip the Over-Kneading: Rye dough is sticky and tough. Knead just until the flours combine (about 5–6 minutes by hand), then let the autolyse (resting) do the work. Overworking it turns your bread into a chewy brick.
- Bake Low and Long: Preheat your oven to 325°F and bake for 50–60 minutes, covered with foil the first 30. High heat burns the molasses before the center cooks. Patience here makes the difference between bitter crust and perfect caramelized sweetness.
Make-ahead tips for this dish
Fermentation Flexibility
This dough thrives on patience—ferment it for 12-24 hours at 68-72°F for maximum flavor development. I recommend using your oven with the light on to maintain a consistent temperature. For a quicker version, ferment for 8-10 hours, but expect slightly less depth in flavor.
The longer you ferment, the more complex the molasses notes become, so don’t rush this step. 🌱
Refrigerator Prep
Shape the dough into a loaf, wrap tightly in plastic wrap, and refrigerate for up to 48 hours before baking. This cold fermentation enhances flavor and makes the dough easier to handle.
I often prep my dough the night before and bake it the next morning—this slow rise creates a more authentic texture. Just let it sit at room temperature for 1-2 hours before baking to bring it to the right temperature. ❄️
Freezing for Later
Baked pumpernickel freezes beautifully for up to 3 months in airtight containers or freezer bags. Wrap individual slices in parchment paper before freezing to prevent sticking. To reheat, wrap the loaf in foil and warm at 300°F for 10-15 minutes until fully thawed and crisp.
I love freezing extra loaves for quick sandwiches or toast—it’s like having a German bakery on standby. ⏰
Make-Ahead Dough
If you’re short on time, you can prepare the dough up to 2 days ahead and store it in the fridge. Let it come to room temperature before shaping and proofing.
For best results, I recommend fermenting the dough for at least 6 hours before baking, even if it’s been refrigerated. This ensures the yeast remains active and the flavor develops properly. 💡
Storage for Freshness
Keep baked pumpernickel at room temperature in a cotton bread bag or wrapped in a towel for 5-7 days. The towel helps maintain moisture and prevents the crust from drying out.
For longer storage, freeze the loaf whole—this preserves its texture and flavor far better than refrigeration. I always keep one loaf in the freezer as a backup for busy weeks. 🌾
Reviving Stale Bread
If your pumpernickel loses its crispness, revive it by wrapping in foil and warming at 350°F for 10 minutes. For extra crispiness, brush the crust with a little water and toast in the oven for 3-5 minutes.
This trick works wonders for sandwiches or serving with butter. I’ve even revived stale slices by lightly toasting them in a pan—perfect for quick breakfasts. 🔥
Nutrition facts
Frequently asked questions
Why does traditional German pumpernickel use molasses?
Molasses adds that signature deep, caramelized sweetness that defines authentic German pumpernickel. It enhances the rye flour's earthy notes while creating a rich, complex flavor profile. Traditional recipes often use unsulphured molasses to avoid bitterness, but some German bakeries skip it entirely for a more subtle sweetness.
Can I make this recipe without molasses?
For a more traditional German version, replace the molasses with an extra 0.25 cup of caramelized sugar or 0.375 cup of maple syrup. The flavor will be slightly less intense but still authentic. Some German recipes rely solely on rye flour's natural depth and a touch of salt for flavor.
What makes this pumpernickel different from store-bought?
Authentic German pumpernickel uses stone-ground rye flour and a long fermentation (up to 24 hours), which develops complex flavors store-bought versions can't match. The slow rise also creates a dense, moist crumb that stays fresh longer. Store-bought often contains additives and shorter fermentation times for shelf stability.
How do I fix a dense or gummy pumpernickel?
If your loaf turns out too dense, check your fermentation time—it may need 12-24 hours for proper flavor development. Overmixing or insufficient yeast can also cause gumminess. For a quick fix, slice and toast the bread lightly to improve texture. If the issue persists, try reducing the molasses slightly (to 0.375 cup) and increasing all-purpose flour by 0.25 cup.
What's the best way to slice this bread?
Use a serrated knife and cut against the grain for clean slices. For the most authentic experience, let the bread cool completely first—this makes slicing easier and prevents crumbling. If you're serving it for sandwiches, slice thicker (about 0.5-inch) to hold fillings better.